![]()
![]()
![]()
![]()
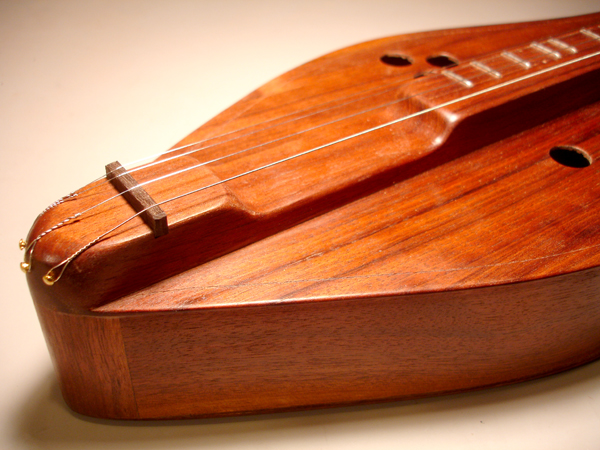
The Hammack Dulcimer
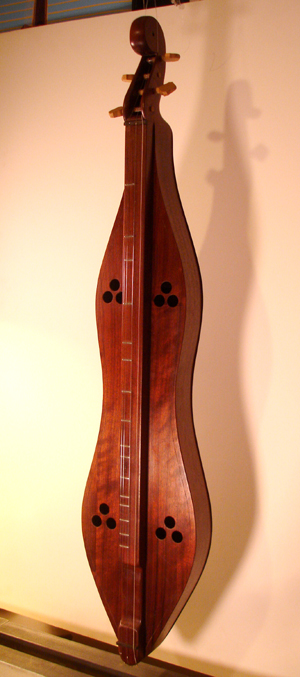
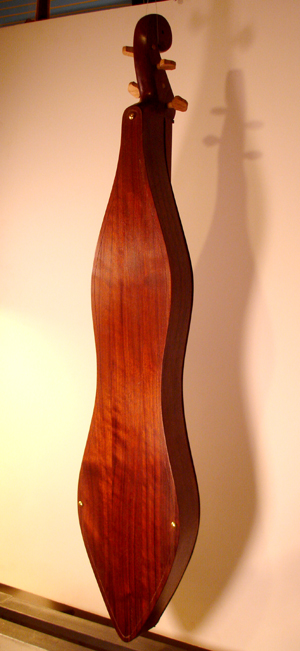
This page is dedicated to my reproduction of a dulcimer in the Smithsonian collection which I documented in 1998. Accession #65.0175, the instrument is believed to have been owned by the Confederate cavalryman Charles Hammack, dated between 1848-1885. In walnut with painted black purfling and beveled, overlapping edges. A beautiful shape, it was the standout of the collection of 10+ instruments which I drew and photographed. Staple frets lying only under the first double course.
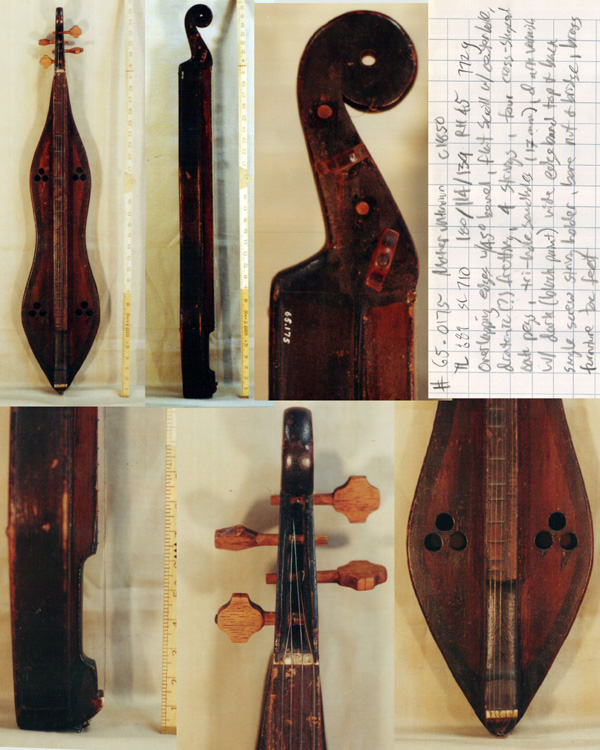
A contact sheet of some of my study images.

The slab of walnut I had was far from quartersawn, so slicing the sides at a true quarter on the bandsaw was a challenge. The pieces in the front have been drum sanded to just over 2mm thickness. The block to the left will be the headstock.
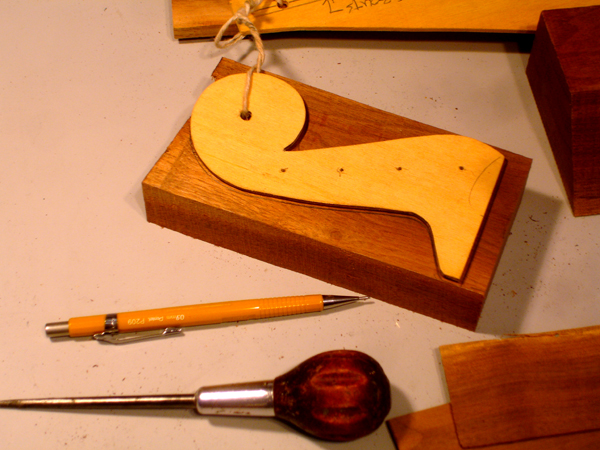
The pegbox template
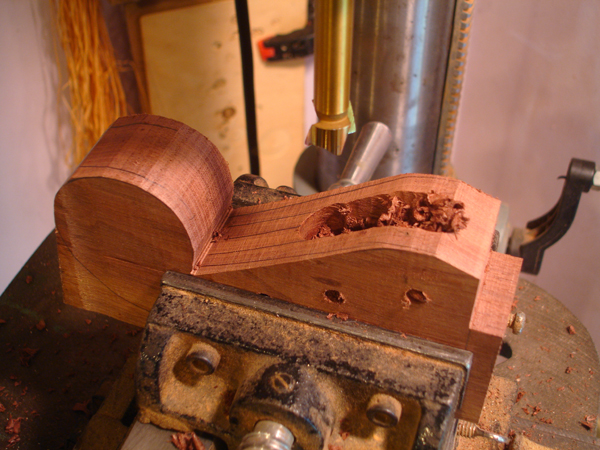
Drilling out the pegbox after the peg holes have been drilled but before the sides are tapered.
Two operations going on here: the liners are being glued to the rib and the pieces for the back are being joined. I am using walnut for all the secondary parts of the instrument. This will be an entirely walnut instrument. The rural makers of the earliest dulcimers instinctively used a single wood throughout, except for the purpose of aesthetics.
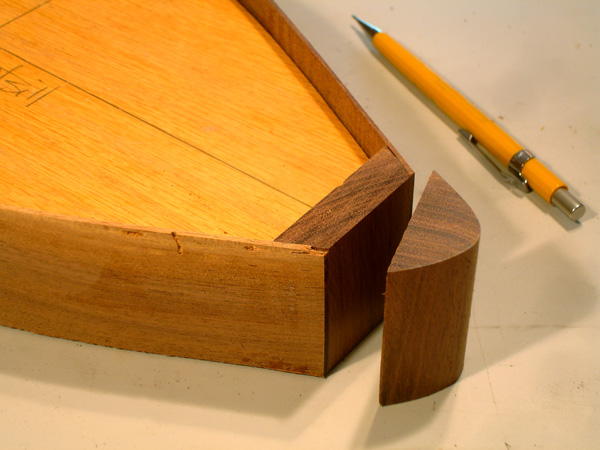
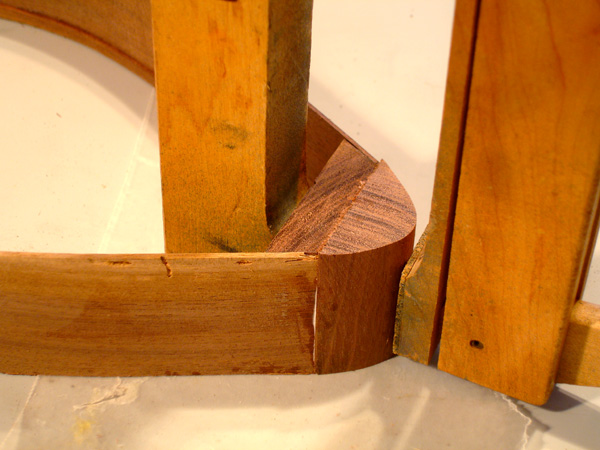
I used to attach the ribs to one single block at the tail, with the appropriate rebates, but as I've made more of this model I find it easier to attach them to an 'internal' block, level the face, then scab on a 'cap block'. Who knows how the original was made - unless we x-ray it - but I think this pragmatic development is in the spirit of the early makers.
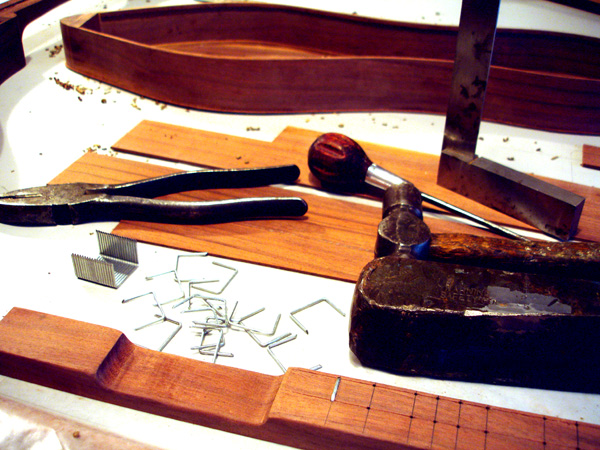
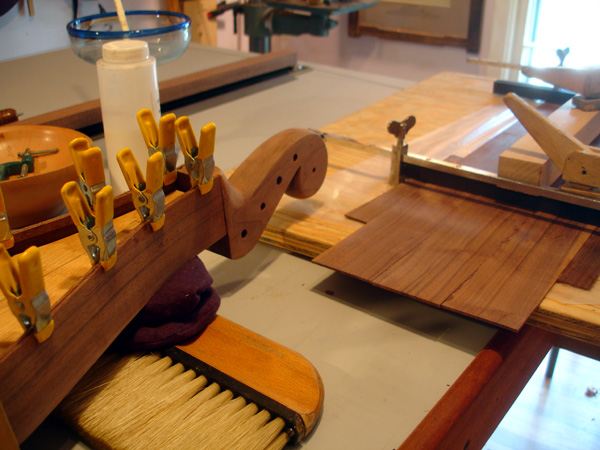
Putting in the staple frets. I found these industrial staples that approximate the weight of the originals but they're the wrong width for an instrument that just has frets under the first course of strings. So I'm pounding them out and reshaping them. Pencil lines show the pre-drill locations and will be sanded out, but the scribe lines to mark the rows of holes along the length will remain to show the maker's hand.
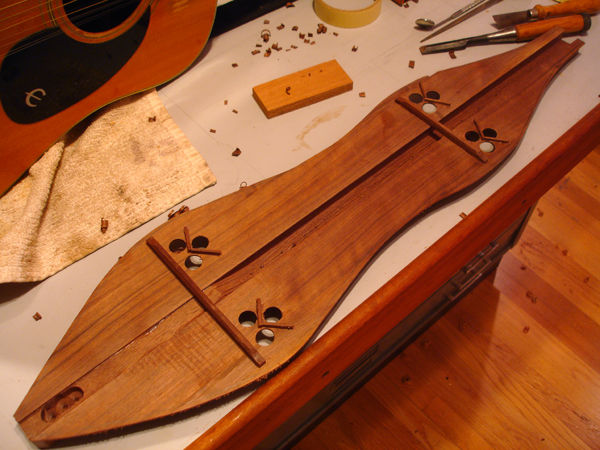
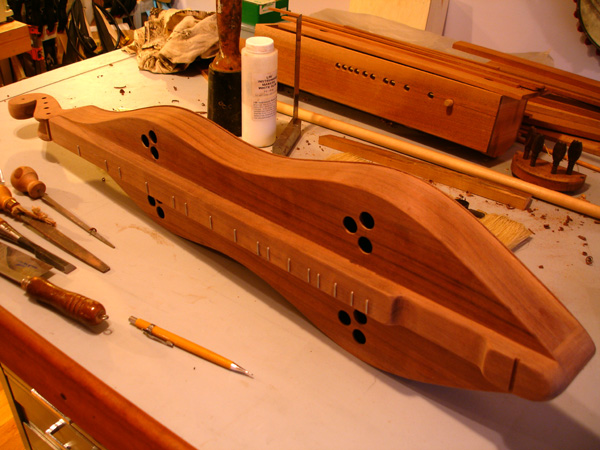
I put small cleats between the soundholes to prevent splitting and spars under the sets to prevent soundboard collapse. I doubt the original had either one of these precautions, which makes it amazing that after 150 years there is no damage to the top. This view also shows a hollow drilled out under the bridge location. Most of the earliest dulcimers had solid sticks for the raised fingerboard. I was unable to get inside the original, but it is a very light instrument and I believe it is possible that the fingerboard is in fact hollowed.
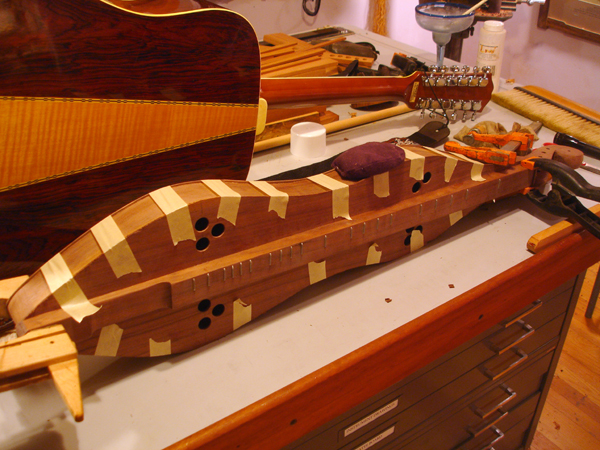
Taping the top down.
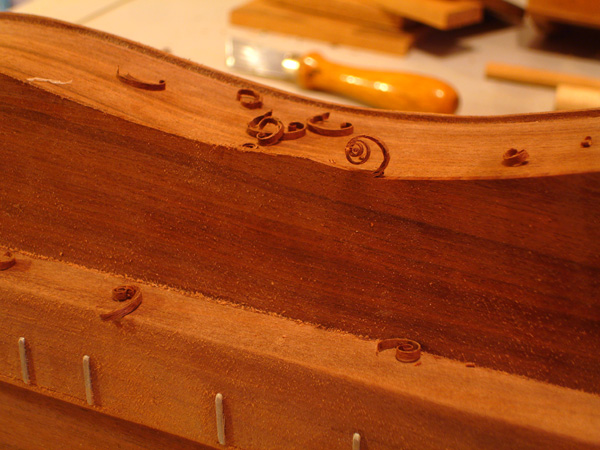
Trimming the top. I could do this with a router bit but it's mroe fun by hand.
I tend to take pictures of the operations i enjoy the most.
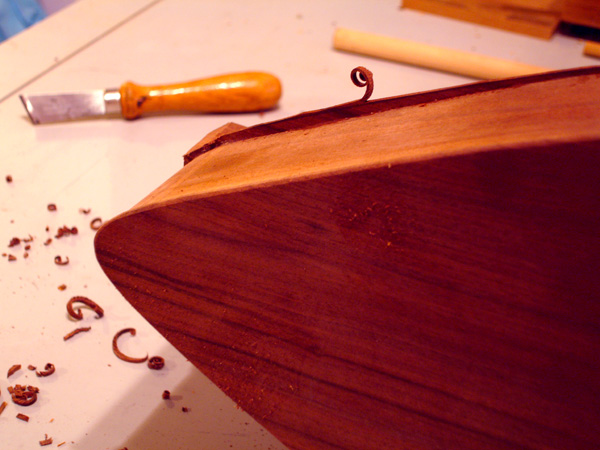
The top is trimmed. The nut and bridge slots are cut. The next step is making the pegs.
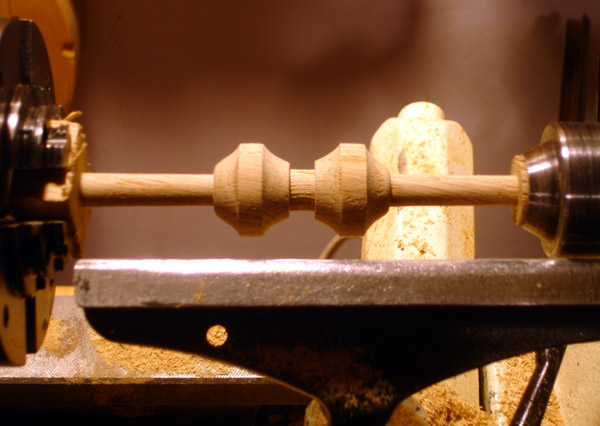
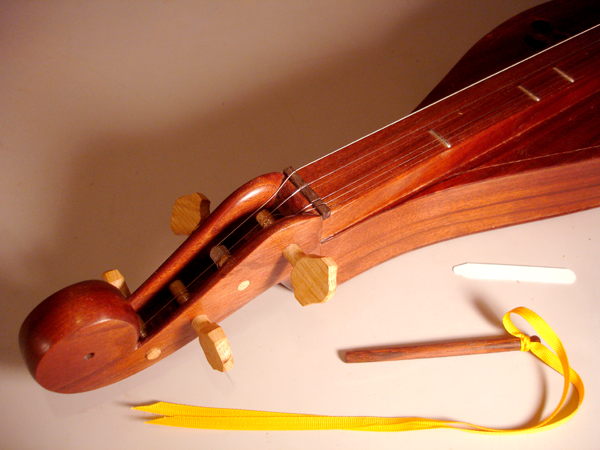
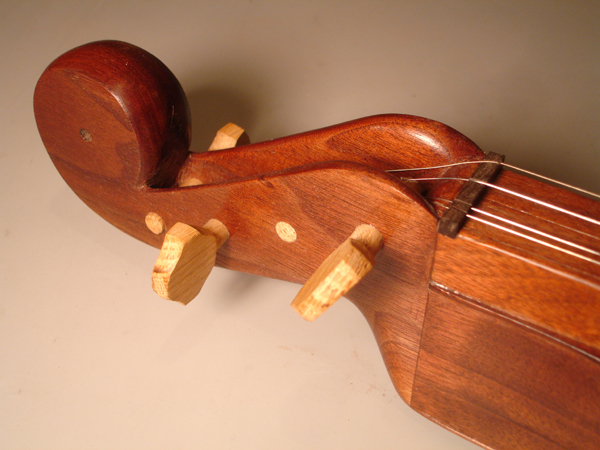
The instrument has unusual cross-shaped pegs in oak, which I have not seen on any other instrument.
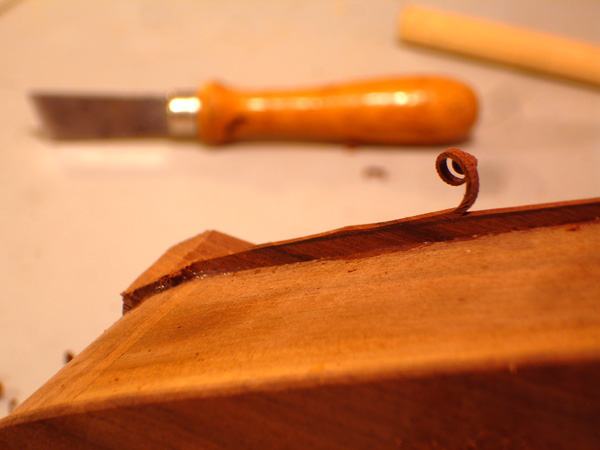
Scratching in a purfling line. The original has black paint on the edges but this version will have only a line scribed to represent the original treatment. I have seen this detail on many 19th c. dulcimers. The makers echoing the inlaid pufrling they had seen on violins.
++++++
Completed images:
 ..
..

Click here for a video of me playing 'King of Love' in this instrument.
++++++
The Glasebrook Dulcimer
An instrument made on my "deGive" pattern (See here) of pecan wood which I culled from planks bound for a paneled study in a house my firm designed on Sea Island, Georgia
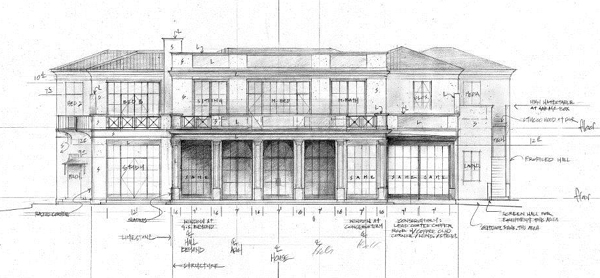
A study for the ocean elevation.
.jpg)
Pieces cut for the headstock, still showing my pencil "approved" for the millworker making the room. I kept two planks as control samples for the duration of the project. We made a trip to a lumber yard in Kennesaw to select the pieces with the best figure from a stack that was brought from Texas. The house was jsut completed, March 2018.
.JPG)
.JPG)
I am doing something new in the way I carve the peghead. Usually in these 19th c. pattern instruments the pegbox is carved from a single, solid piece of wood. But since I am working with planks that are only about an inch thick I have to join two pieces together to get the desired thickness. So I'm taking this opportunity to route out the peg channel before seaming the two pieces together.
.jpg)
With the piece turned upside down on the router I'm shaping out the channel "blind" as it were. Constantly checking to see how close I am to my pencil shape.
.jpg)
Since the peghead is tapered but the cheeks want to remain a consistant thickness I am removing material on the inside seam before joining the two halves.
.jpg)
With the tapering complete. One down 3 to go.
.jpg)
General view of the work including a Hummel-shaped dulcimer I'm making out of maple. My guitar project nearby stands ignored.
.jpg)
.jpg)
The ribs are bent and dry fit to the form with an end block. I'm making two identical instruments
.jpg)
Gluing up the two halves of the pegbox
.jpg)
Dry fitting the pegbox and ribs and starting to look at the fingerboard blank
.jpg)
Cleaning up the routed channel and easing the edges of the cheeks
.jpg)
The pegs are turned. I'm making the entire instrument out of the same plank.
.jpg)
Peg heads shaped and fitting to the headstock
.jpg)
Fitting the liners
.jpg)
.jpg)
As on the deGive dulcimer I'm making the frets out of fence post staples, a common implement found on the pre-revival instruments. As before, I am having to pound them out to make the face slightly longer for my wider fingerboard. I have always liked the addition of a drilled hole at the top of the fingerboard of "Virginia pattern" instruments so I'm adding this detail for the first time. Even though my "deGive" pattern is closest to a West Virginia shape.
.jpg)
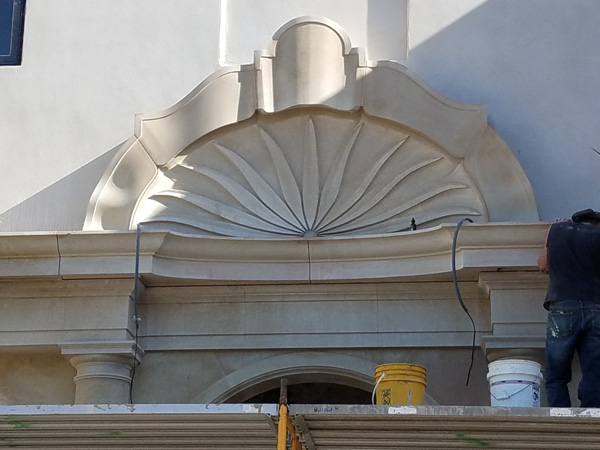
The strum hollow shaped as the deGive instrument. But this shape as well as the peghead scroll is a nod back to features in the house design. The ribbon of the fronton over the Loggia entry. . .
.jpg)
Only after the frets are in place do I route out the channel on the back of the fingerboard. First with sucessive cuts on the tablesaw, then with the router.
.jpg)
The fingerboard is complete
.jpg)
The top pieces are rough-cut and attached to the fingerboard
.jpg)
I'll cut the soundholes after the top is assembled so the positioning can be aesthetically correct
.jpg)
I use a knife to slice out the shape after drilling.
.jpg)
Splines attached at the underside, very inportant to keep the top from splitting around the holes
.jpg)
The finish is two coats of button shellac and a healthy topcoat of beeswax. My second instrument is lagging behind!
.jpg)
.jpg)
Completed image, with a cittern and the first deGive dulcimer on the left, made out of heart pine.
++++++
Dulcimer chap book:
For the dulcimer rhimes are grace place and the like.
-Christopher Smart
Dulcimer over the fireboard, hanging sence allus-ago,/ Strangers are wishful to buy you, and make of your music a show;/ Not while the selling a heart for a gold-piece is reconed a sin,/ Not while the word of old Enoch still stands as a law for his kin.
-Ann Cobb from Dulcimer Over the Fireboard