![]()
![]()
![]()
![]()
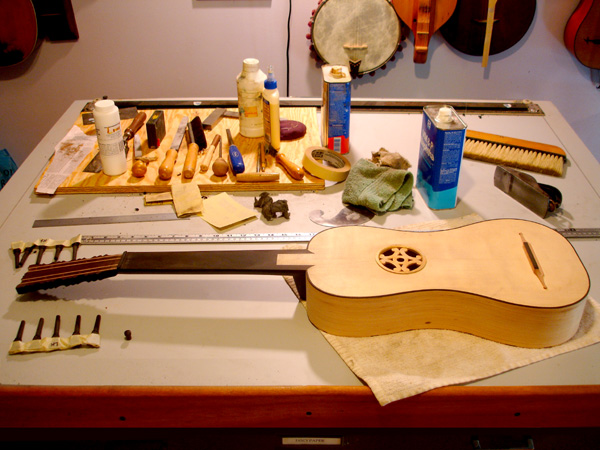
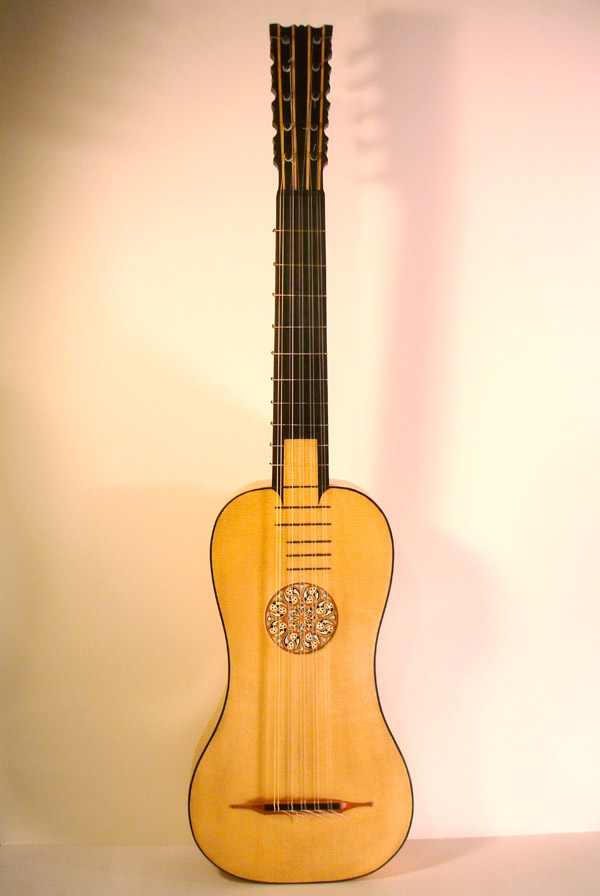
A Baroque Guitar after Christopho Cocho, 1602, Conservatoire De Musique, Paris, 64cm mensur as documented in the book 'Geometry, Proportion and the Art of Lutherie, by Kevin Coates
The instrument can be found on the collection's website here.
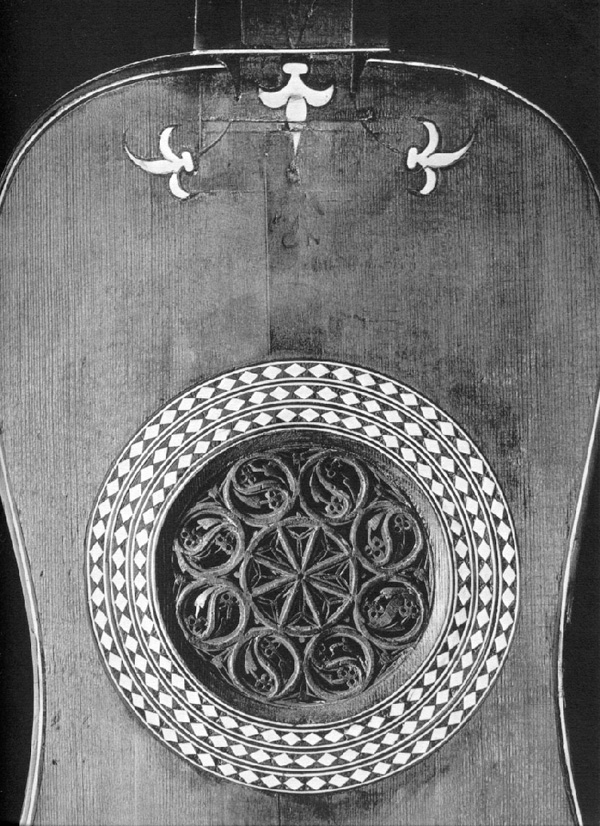
Study photos from the collection:
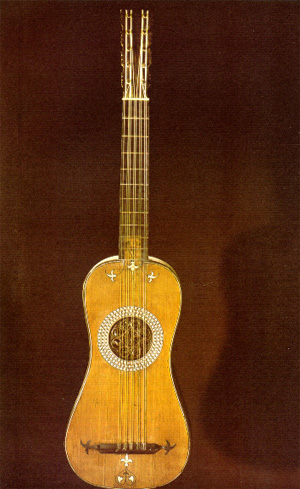
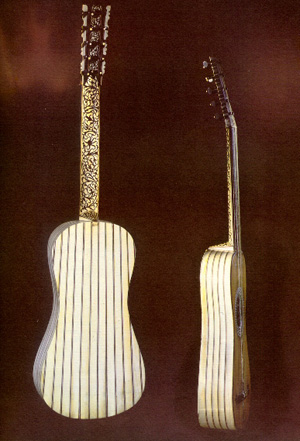

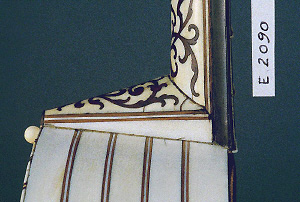
I am drawn primarily to the body shape, which is unusually square at the ends and highly waisted considering the early date. The peghead is stridently Baroque, and the pleasing simplicity of the front presentation in general makes this instrument a good target for my first Baroque guitar. The back and sides are another story. I doubt I will ever have the wherewithal to mount that Everest. The original being primarily in ivory, I produce the instrument in natural maple for a similar effect without animal involvement.
The following shows the construction process of my third interpretation of the original. Dates given are website postings, not actual workdays.
Wednesday, October 20, 2010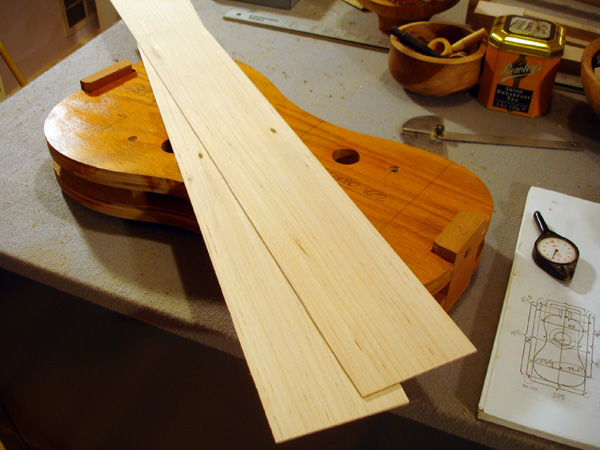
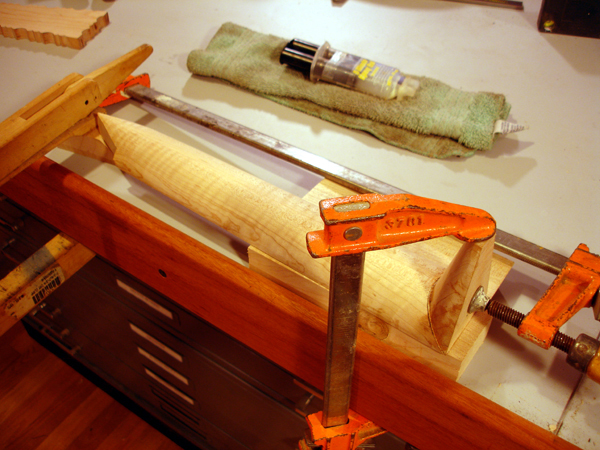
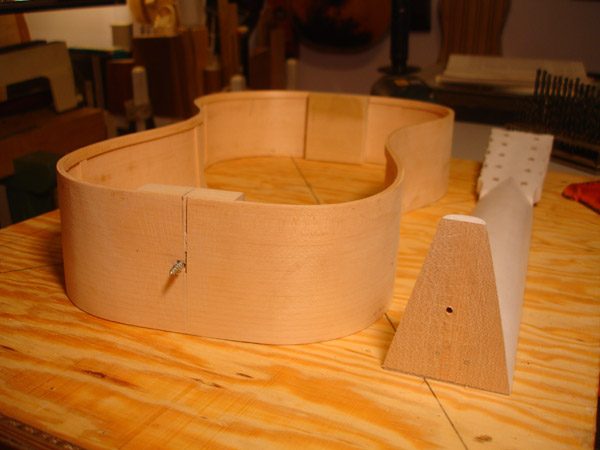
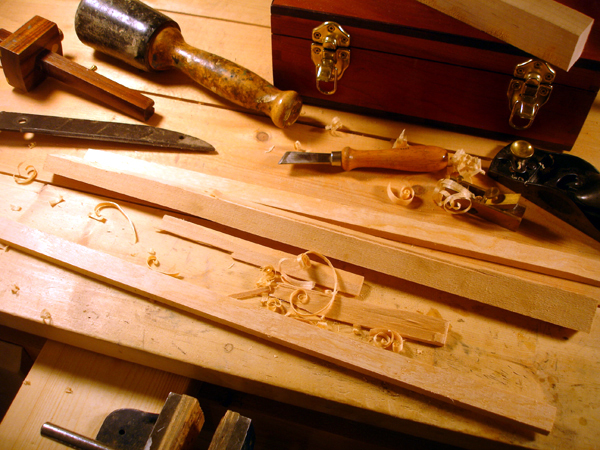
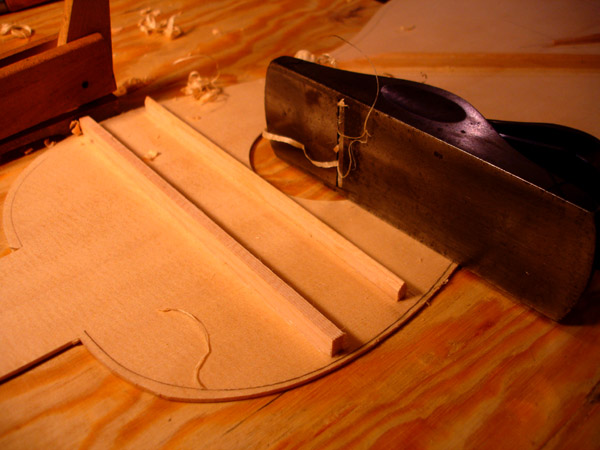
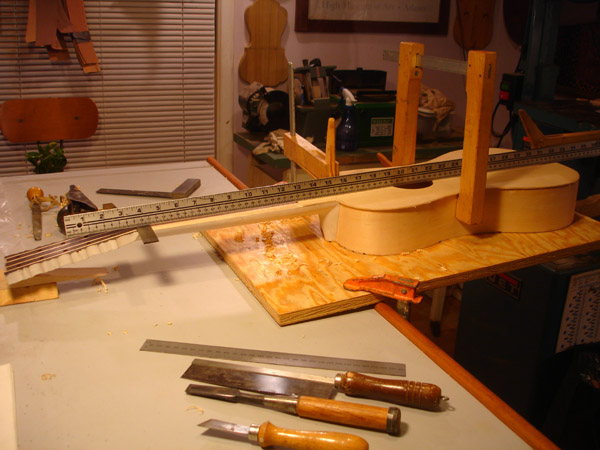
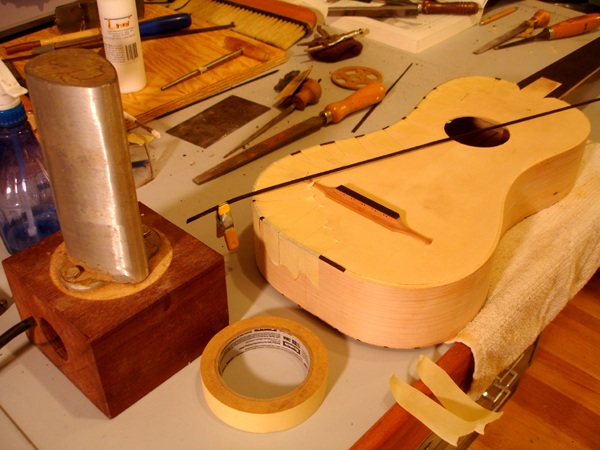
The quartersawn maple sides are planed to a thickness of 2mm. Mahogany blocks are in place on the form. To the right is my source material. Even though I have had the opportunity to make my own drawings of instruments in the Smithsonian collection (the overwhelming number of their guitars from 1600-1900 are behind the scenes and sadly will probably never see the light of display, including a bewildering quantity of chitarra battente) I have chosen this model in a collection in Paris to reproduce because of its pleasing body shape and proportions. It is well documented in the book by Coates.
Bending the sides in progress.
++++++
Tuesday, October 27, 2010
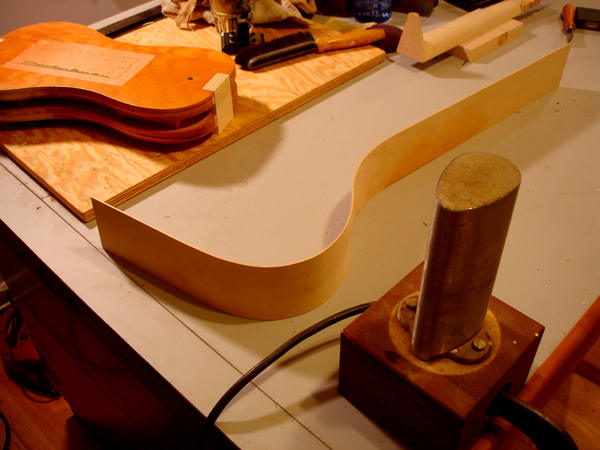
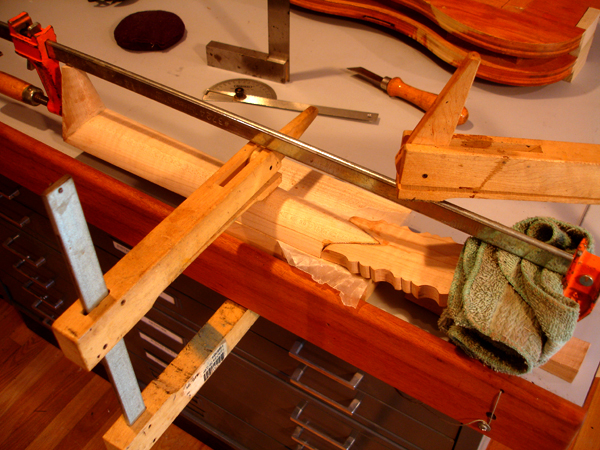
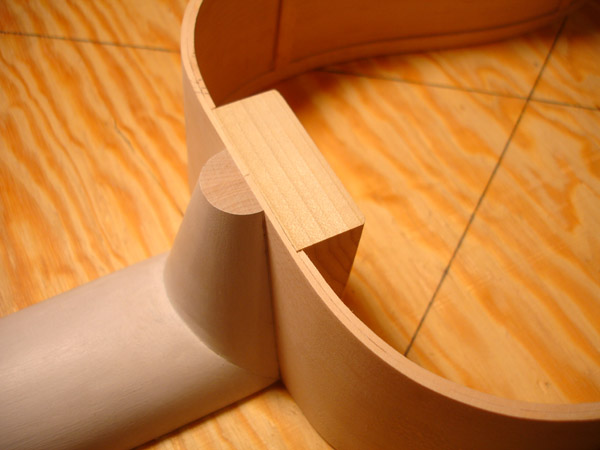
Bending the sides. I have used an electric bending iron and pre-soaked the wood. Attaching one side at a time to assure that the seams mate perfectly.
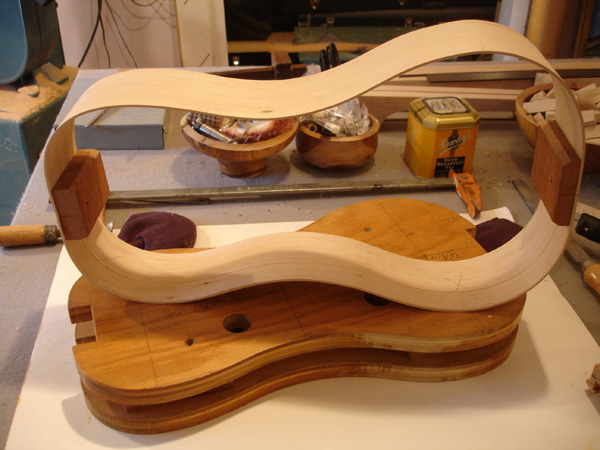
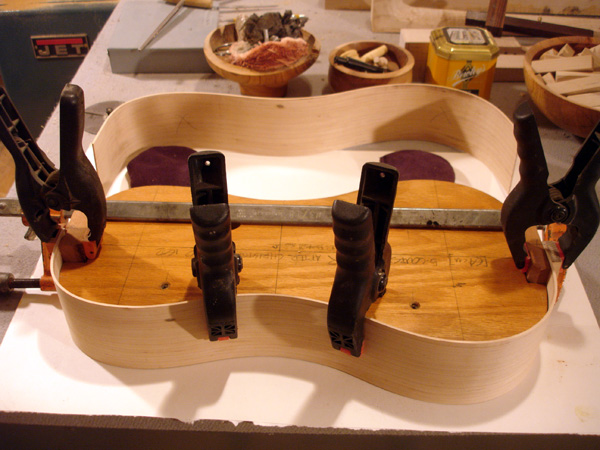
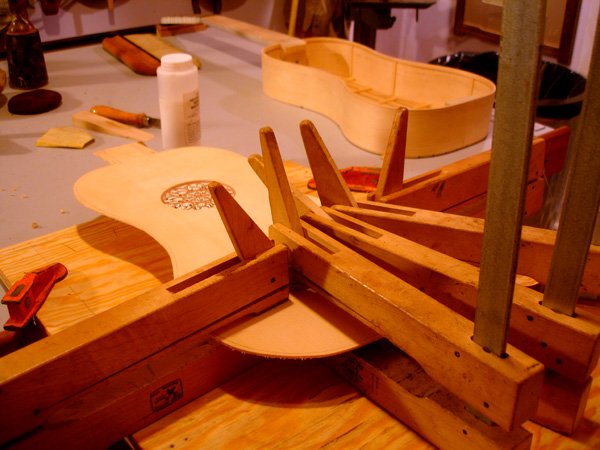
The sides formed. The next step will be gluing on the poplar liners which give more gluing surface to the edges for attaching the top and back. The sides - or ribs as they are called - are only 2mm thick.
 ]
]
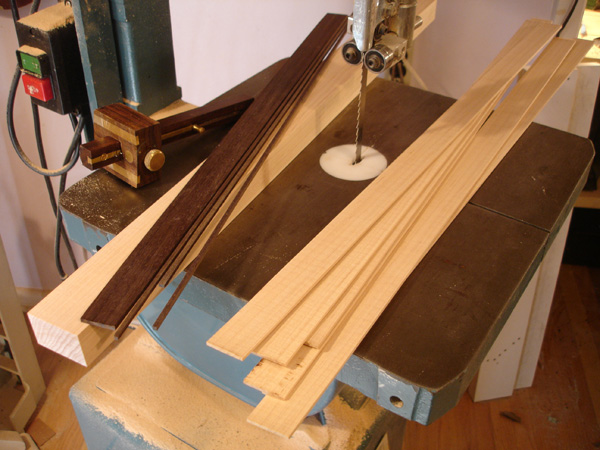
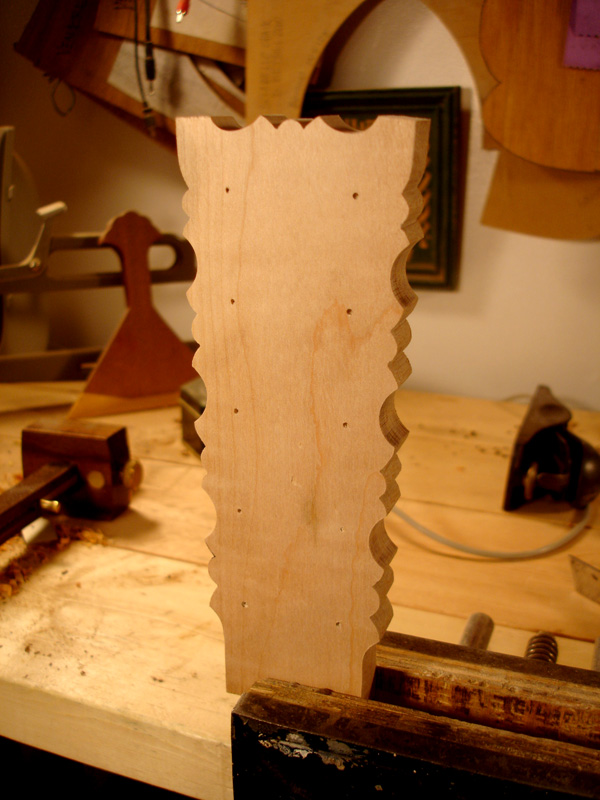
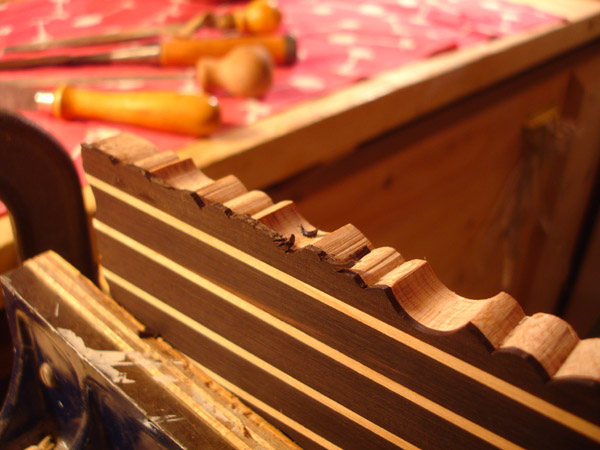
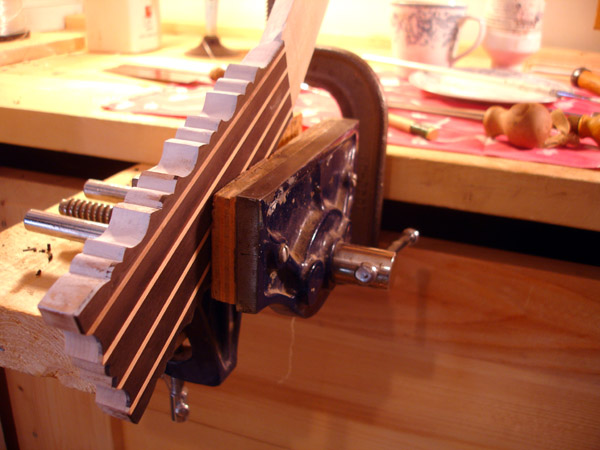
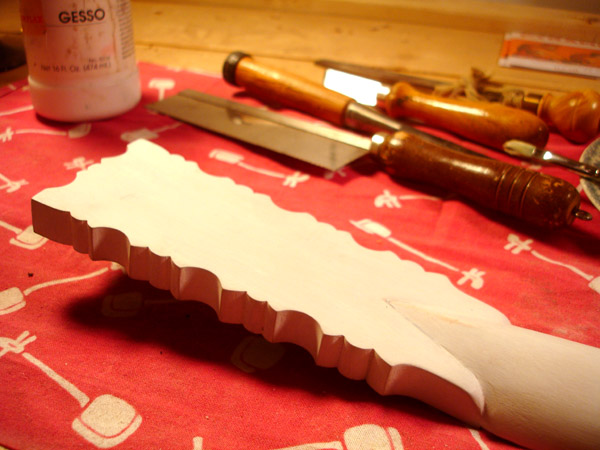
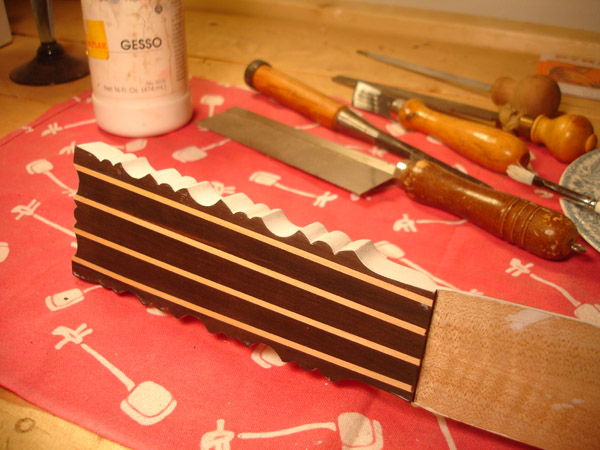
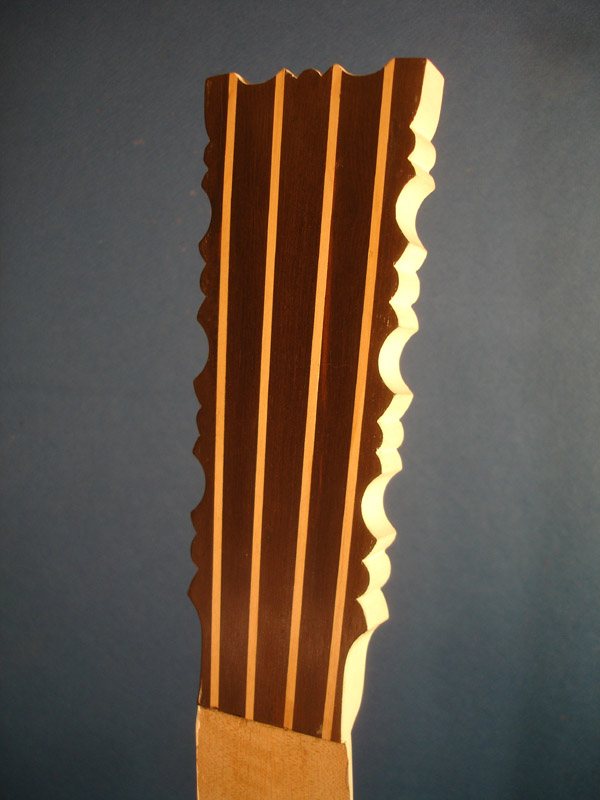
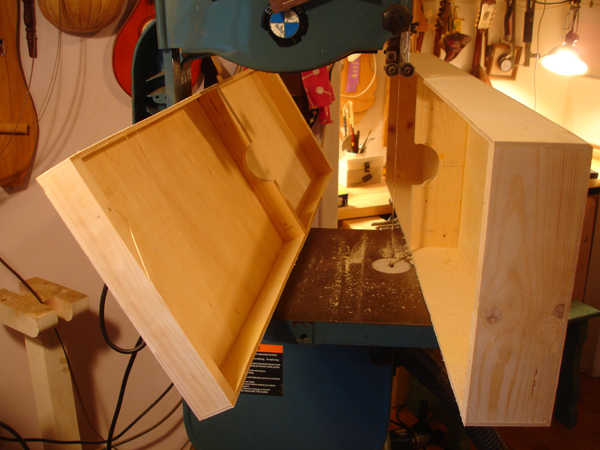
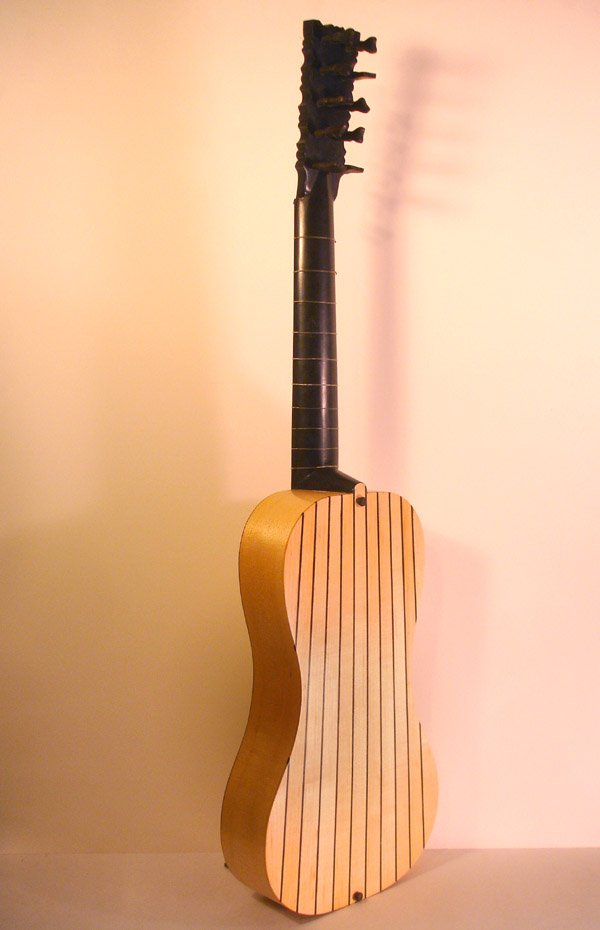
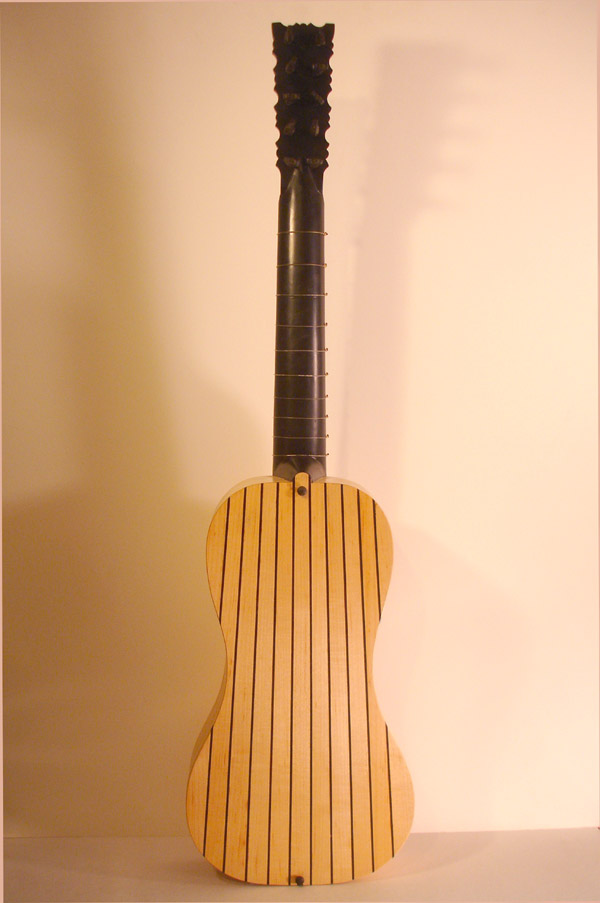
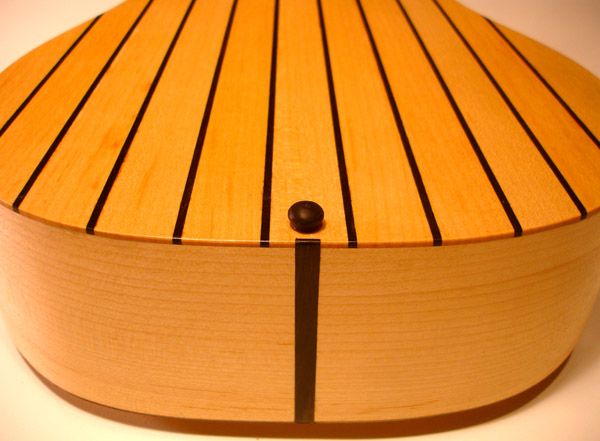
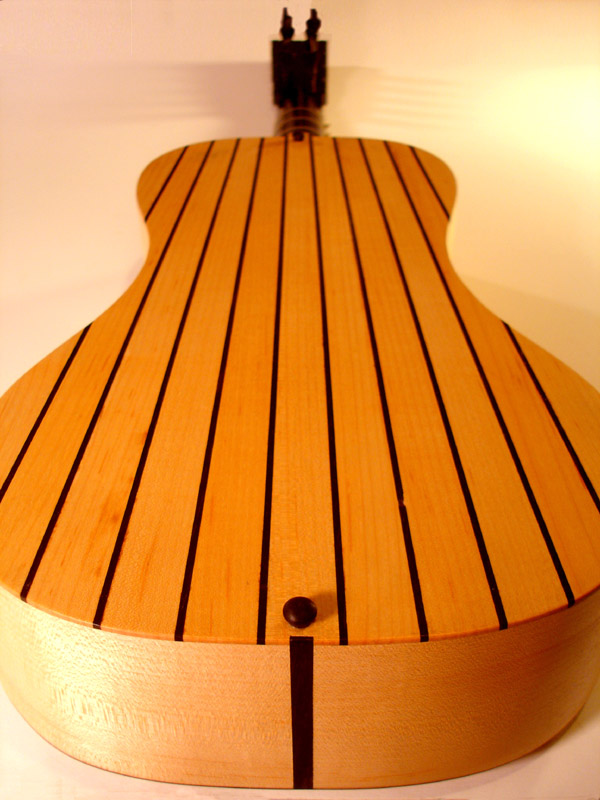
Cutting the pieces for the back on the bandsaw. The maple staves will be tapered to splay the design from top to bottom, using ebony filletts to seperate the pieces, as the original design.
++++++
Tuesday, November 9, 2010
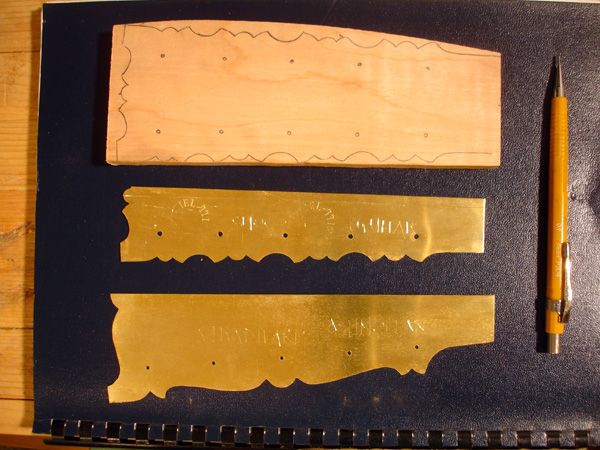
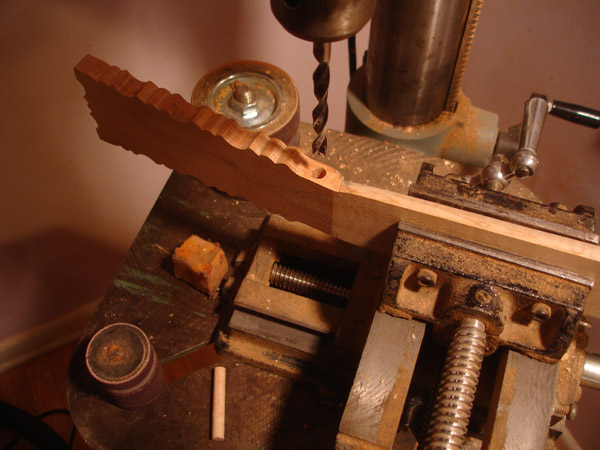
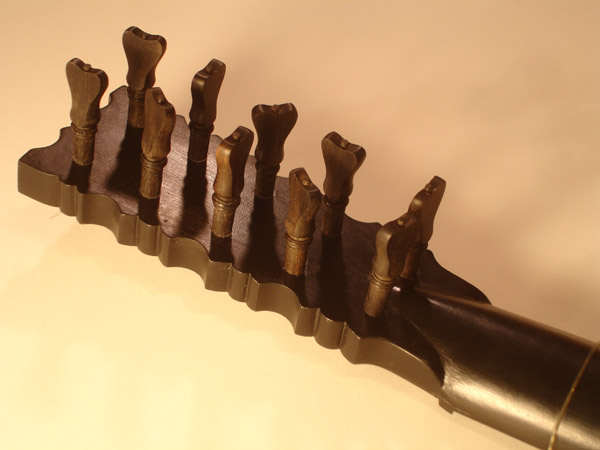
The peghead shape is transfered onto a blank from the brass template. Compare to the later 168[0?] Ashmolean Stradivarius shape which is much wider, more Spanish-feeling.
++++++
Wednesday, November 10, 2010
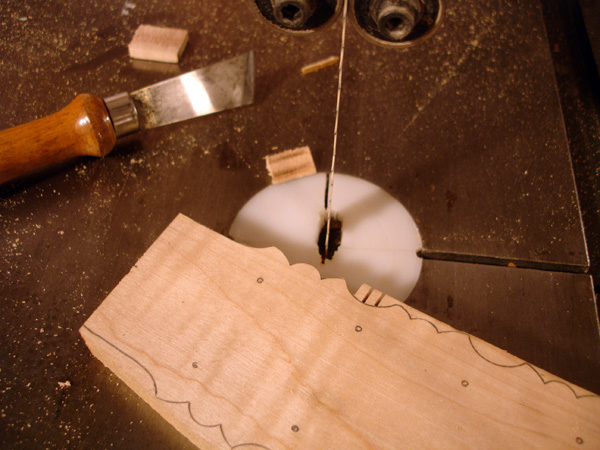
The traditional way to cut out the flourid outline of the peghead was with a coping saw. I like to do the rough shaping with the bandsaw and trim it up with the knife and small sanding drums
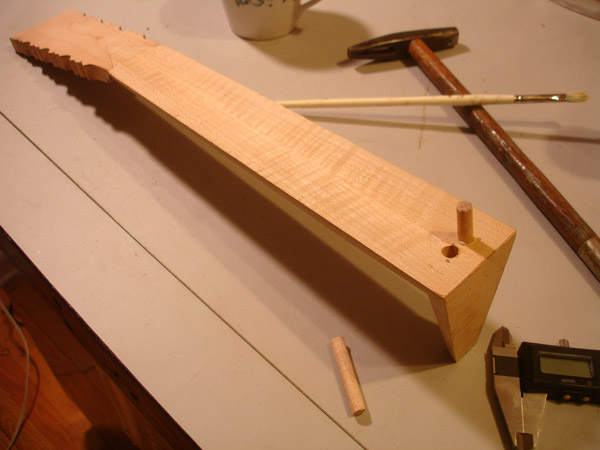
After cleanup. Modern clasical guitars and other instruments with simple peghead shapes usually have the face veneer glued on before the outline is shaped. However in early guitars where the peghead and neck are two seperate pieces of wood, the face veneer is applied after the joinery and over the seam strengthens the joint.
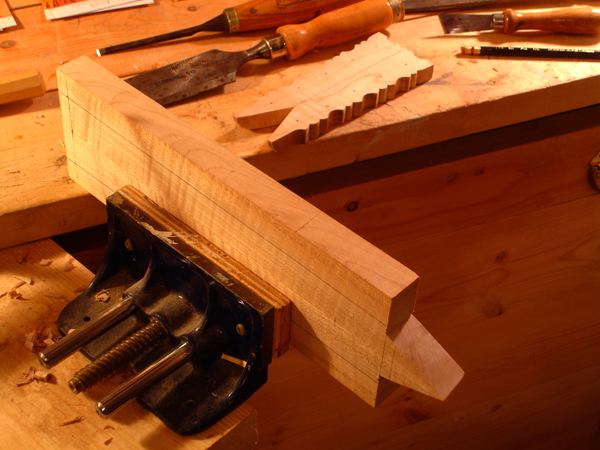
Shaping the neck v-joint is easier when the stock is still square.

Scribing the neck profile onto the heel blank

The profiles are marked off for shaping of the heel.

This is a "what would Stradavarius do?" moment. If he had ___, would he use it? Fill in that blank this time with the word 'epoxy.' With the glue on both surfaces I shoot the two pieces together with a couple of wire brads. This keeps the pieces from shifting as the pieces are clamped up. When it is dry I will tap two dowels through the joint from the top. This will pretty much guarantee that the joint never comes apart.
With the heel attached I have a good clamping surface to press the peghead into place, again using epoxy. Gentle pressure from a cam clamp on top and a wedge underneath ensures the proper angle. After the glue sets I will insert a wood dowel through the joint from the side of the peghead to lock the joint.
Driving in the pegs.

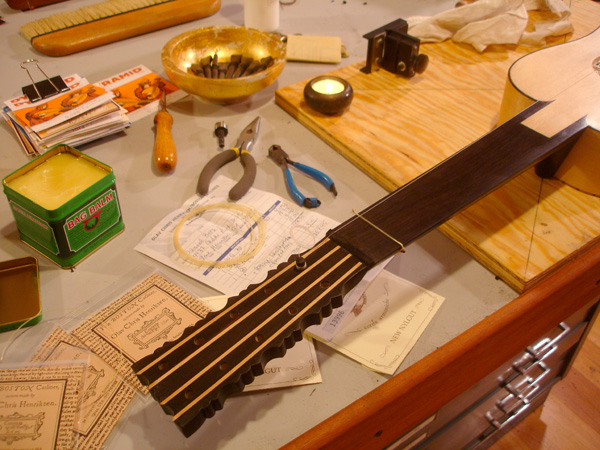
Laying out the peghead veneer.
Trimming the peghead veneer,

The neck is assmebled and the peghead veneer is on. I'm doing some final clean-up before gessoing the neck in preperaition for the final painting. This instrument had a thinner rosewood veneer facing than the ebony pieces of the previous picture.
A scratch coat of gesso is applied. The gesso helps expose recesses in the surface being cleaned up.
A body coat of gesso. I wind up putting about 4 layers on before hitting the final coat with 0000 steel wool.
Before the peg holes are tapped
Arty shot.
The holes are tapped and rough reamed.
++++++
Saturday, March 3, 2011

Gluing on the linings

The pieces for the back are planed and joined. I'm using a large ceramic tile to ensure that the glueup is flat
The surfaces of the heel and body are scratched up with an awl for better adhesion. The screw is only useful for temporarily securing the pieces together for glueup. I will leave it in permanently, but it's the overlapping of the back on the end of the heel cone that is really ensuring that the neck never separates from the body.

Gluing the back to the sides, again using the ceramic tile to ensure flatness and avoid the more traditional rubberband/masking tape method. They didn't have rubberbands in the 17th century, anyways.
The previous instrument had the back attached to the body before the neck attachment. This instrument has the neck attached first. I think this way is easier to assure the neck/body centerline.
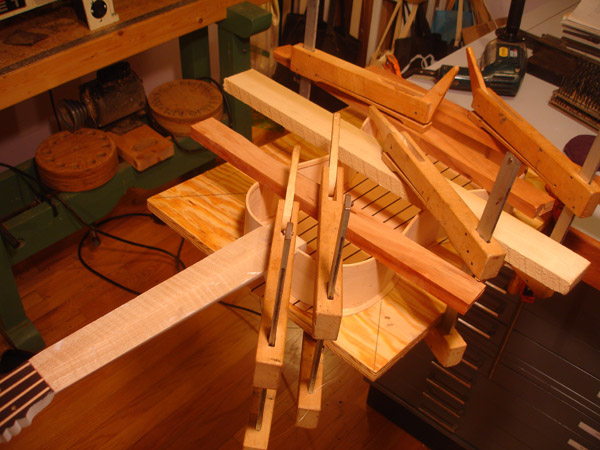
Attaching the back to body. It's easier to trim the back to the body after attachment and in the process of glueup assure the neck/body centerline than to pre-trim the back and use a more convensional attachment method like spool clamps or rubberbands.

The back braces are rough trimmed before attachment to the back.

The back is attached with braces in place. Since I'm not taping all the back stave joints I'm using more than usual braces.

White! The gesso is on the neck but the neck is not yet permanently attached to the body in this iteration..
++++++
Sunday, April 24, 2011
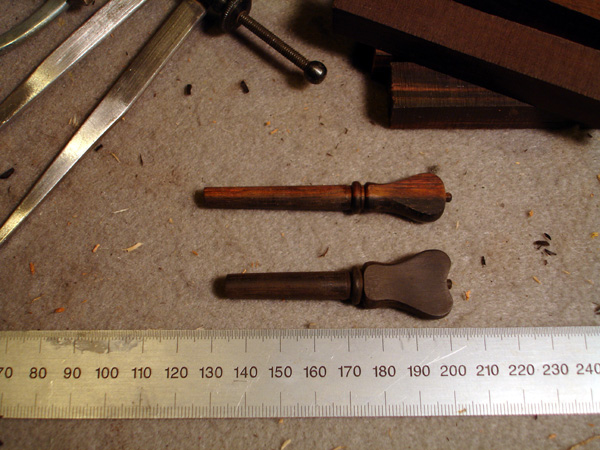
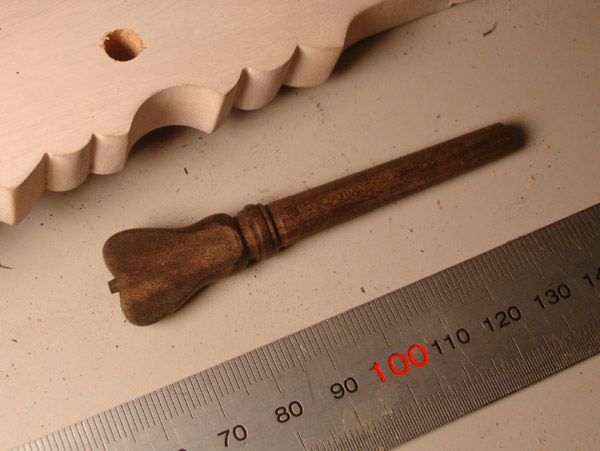
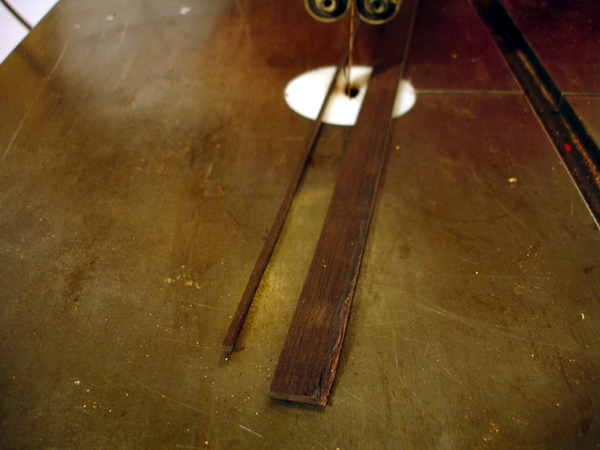
Working on the pegs. Here the new shape (lower) compared to the shape I've previously used which is more like a theorbo. Elegant, but hard to tune due to the small finger surface. Live and learn. The new shape being closer to that found on the original, anyway.
![]()
Ebony billets for pegs, encased in wax.
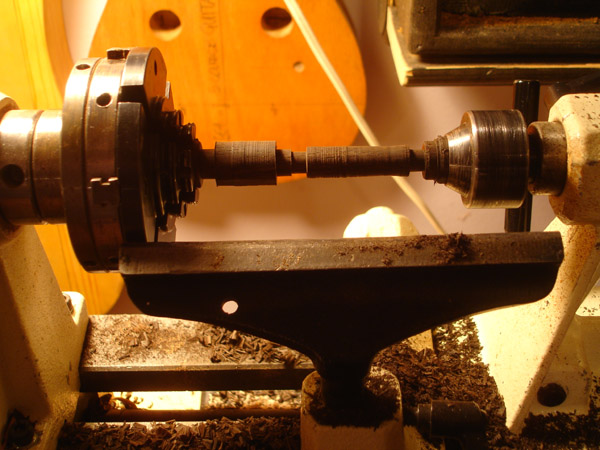
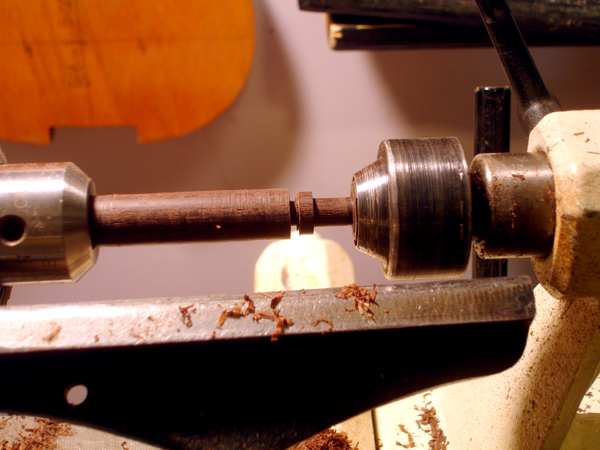
I have the least scientific method for peg turning. In the past I played around with a duplicator but turning a hand crank along a template isn't as rewarding as doing it 'by hand'. And besides I found that after I had set up the template and cutting head, et al, I could have turned 2-3 pegs already. So my pegs may not be exact duplicates, but they're made with love. I have learned the hard way to rough turn between head and tail. . .
. . .then turn it around and work the profile in the very stable headstock. . .
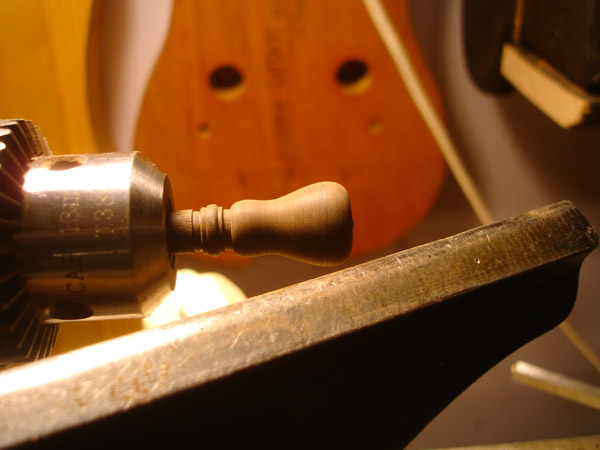
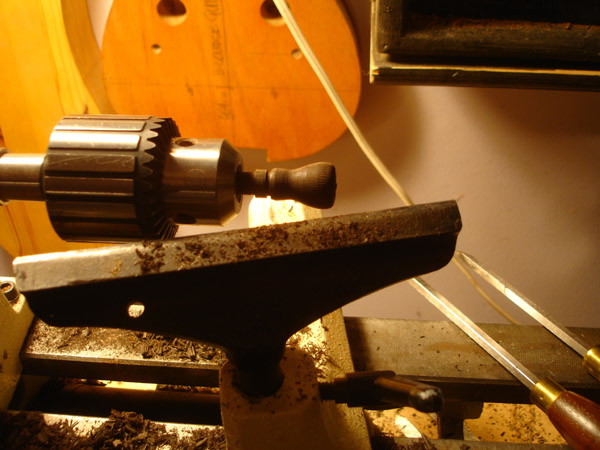
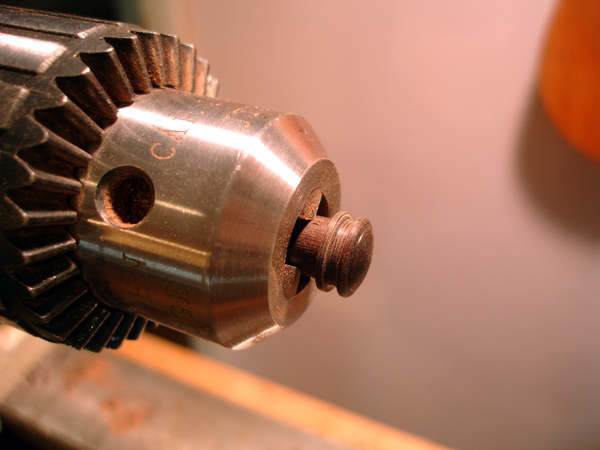
. . .then final finish the head. . .
. . .then saw the head flat on the bandsaw and drum sand it on the drillpress, finally shaving the shaft with the peg sharpener. To think, I actually tried to shape the entire peg between the head and tail long ago in a galaxy far, far away.
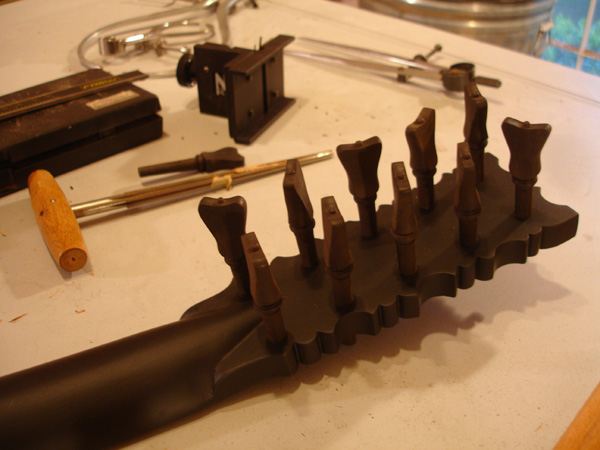
The peghead is complete, with the pegs rough tapered, standing a little tall. With some of the implementia of peg making.
++++++
Tuesday, May 3, 2011
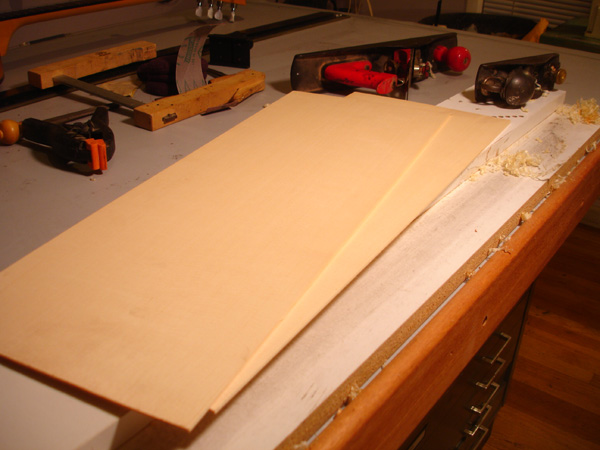
The AA Engleman Spruce top is rough thicknessed to 2.5mm and the joining edge is trimmed on the 'shooting board'. Block plane for the first passes and the joiner plane for a few final strokes.
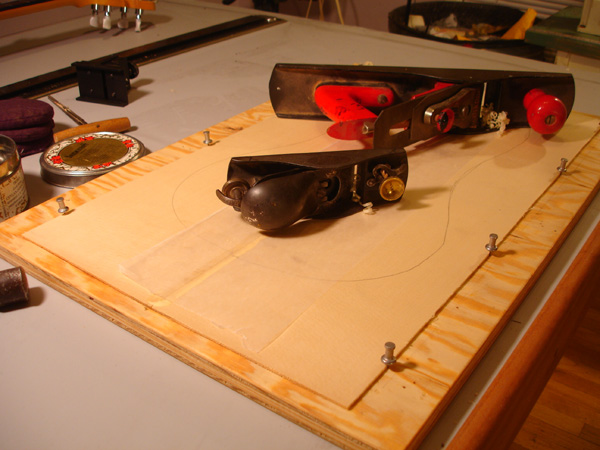
The top is being joined. A simple clamping arrangement of two rows of parallel pins set slightly closer together than the overall width of the top blanks. The pieces are dropped together and form a slight gable shape about 4mm high at the seam. The slight downward pressure to seat them to the board is all the clamping pressure required.
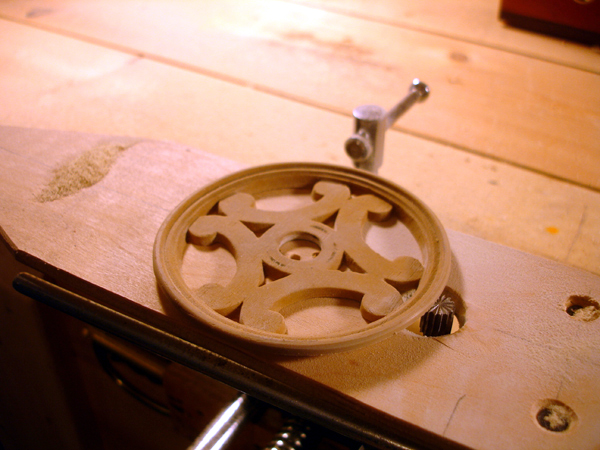
Routing a channel on the back of a resin rosette for a front-mount installation.
The implements for splitting and rough shaping the table spars. My froe is a hedge trimmer blade.
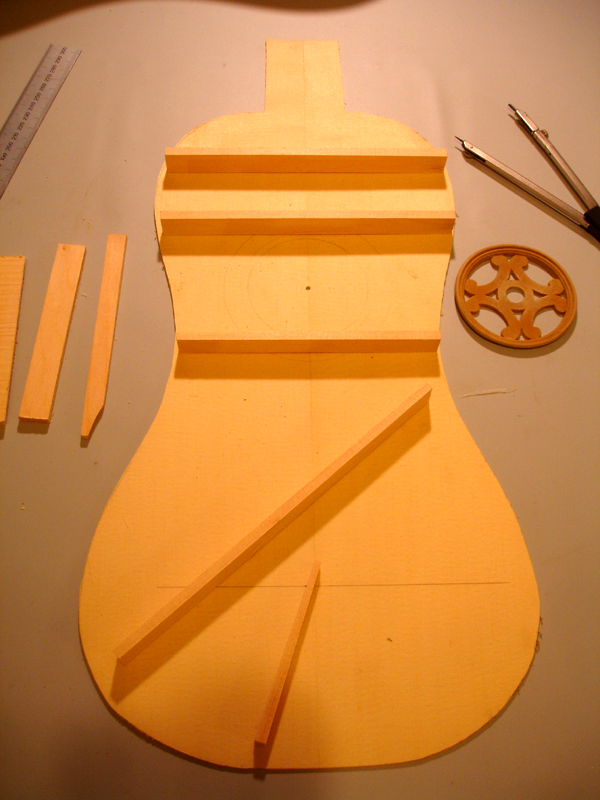
The spars layed out on the table.
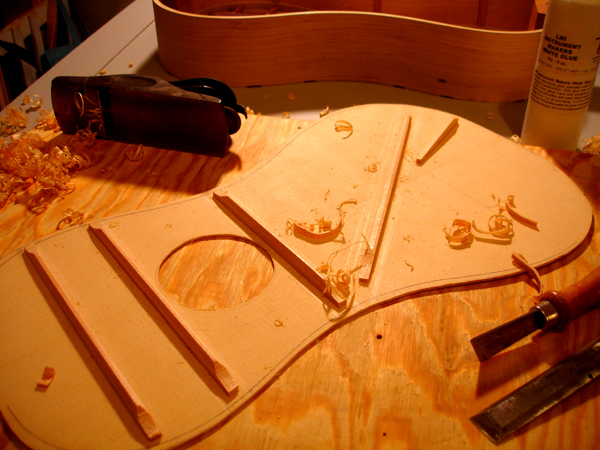
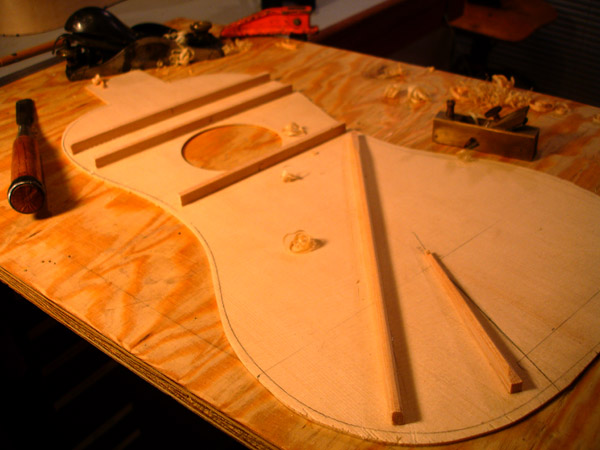
Shaping the spars after they are attached to the table.
Showing the treble tuning bar adjusted
The block plane can be used on the three perpendicular bars.

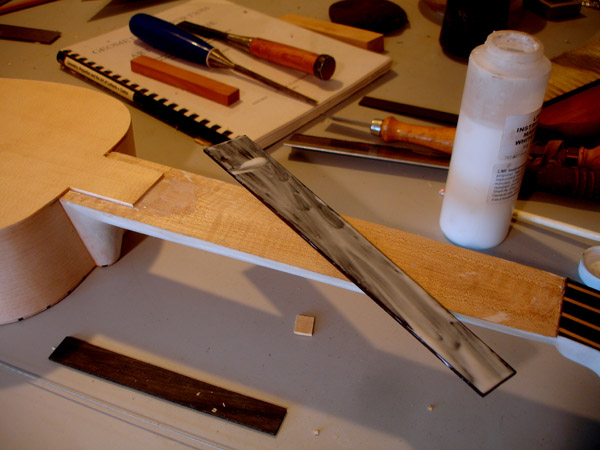
Swiss pearwood blank for the bridge, and the fingerboard veneer prepared.
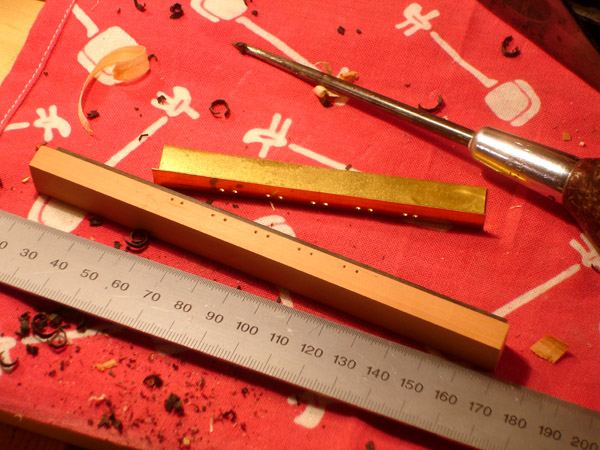
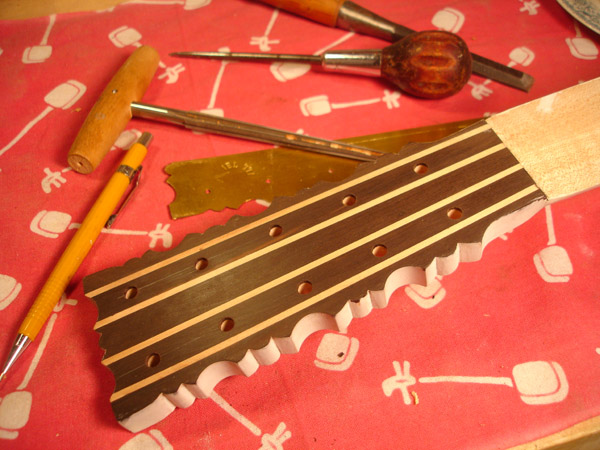
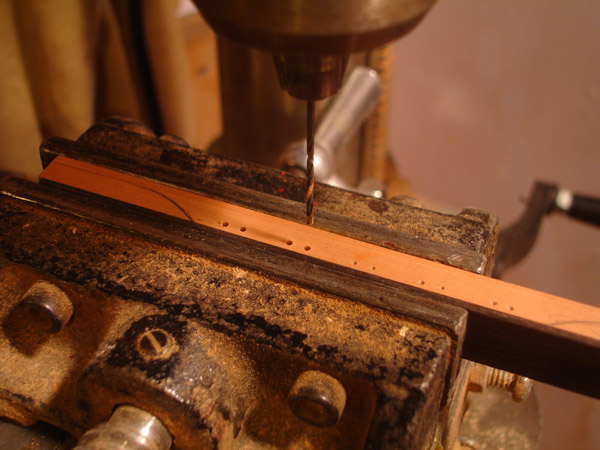
Using a brass template to locate and prick the holes for the strings. At this point the bridge blank is taller than necessary. I will adjust the final string height after the holes are tapped and the bridge is shaped.
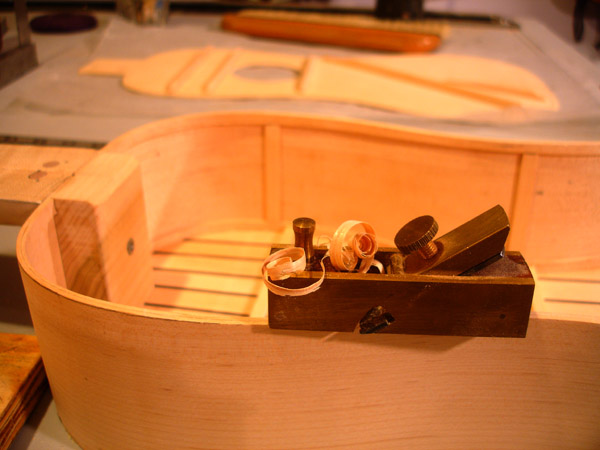
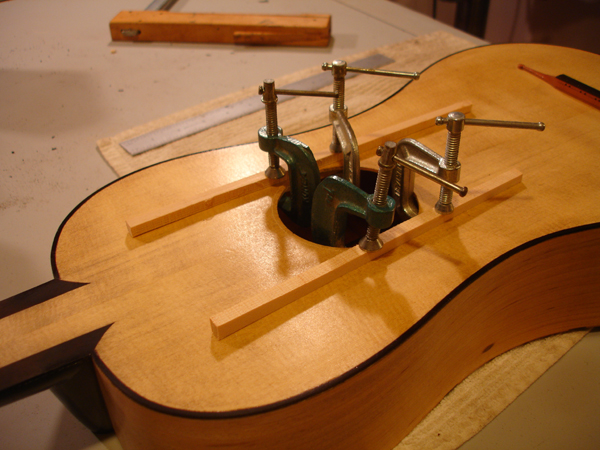
Removing some material from the top of the ribs at the soundhole puts a 'scoop' in the top when attached and gives a little concavity where the table frets are for better clearance.
This is the most important step of the build: setting the neck angle and string height. At this point there is some flexibility in the angle of the neck, which will only be solidified when the table is glued down to the neck. I have an ebony shim a the nut location to compensate for the fingerboard veneer which isn't there yet. A wedge under the end of the peghead raises the action into place.
Guing on the bridge.
Trimming the top flush after attachment.
.jpg)
This and following are some shots of the fingerboard pieces being layed up and set. I tend to take pictures of the operations i enjoy the most. So the painstaking fabrication of the bridge has been been spurred.
.jpg)
.jpg)
.jpg)
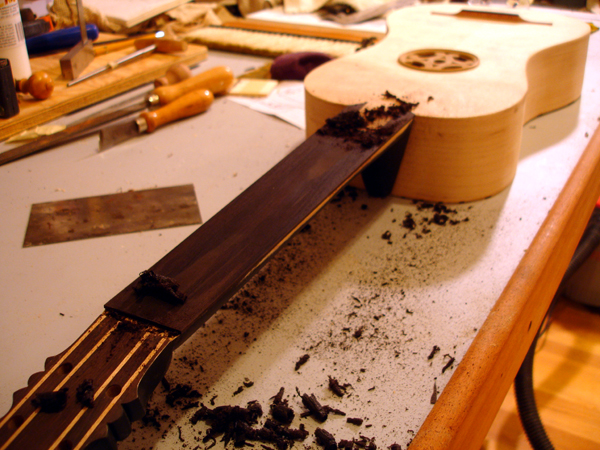
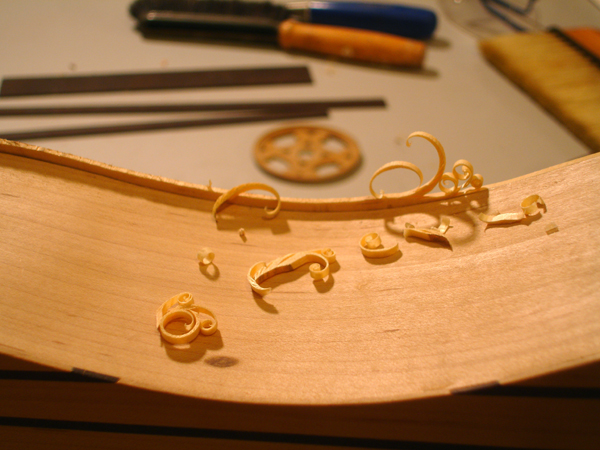
The fingerbard is flattened and then a gentle relief is put in with the cabinet scraper.
I'd like to say that I route my purfling and binding channels by hand, the slow, old fashiond way. But actually I do it the loud, bombastic, modern way with a dremel: lurking in background.
Cutting the soundboard binding strips from a pre-thicknessed strip of ebony.
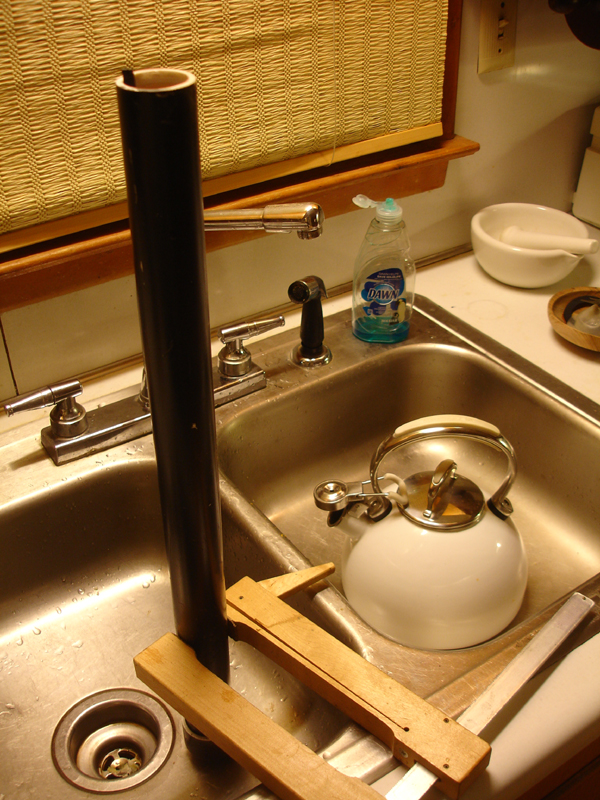
Good home lutherie should have at least one operation that is done in the kitchen. Here I have the two binding strips in a pvc tube of boiling water. Tea break.
Ebony binding attachmnet: masking tape and nerves. I take the strips out of the water and pre-bend them on an iron. If the wood isn't cut exactly quartersawn, and the piece has runnout then a split is almost certain. Got the first piece on ok but the second one is having a split glued. Sheesh!
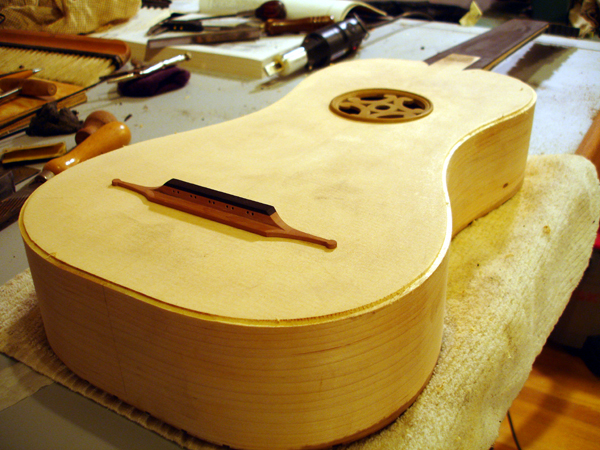
The instrument is 'in the white' and getting the soundboard final sanded and the pegs fit. The last pieces to be made and attached are teh soundboard frets and the nut.
Turning the strap button
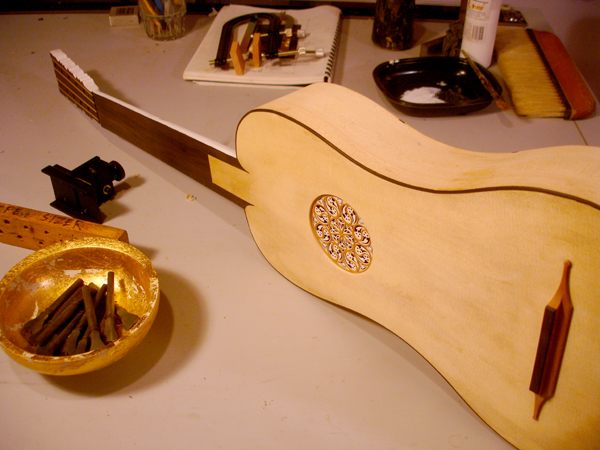
The nut is in and sanding is taking place. The rosette is guilded but just resting in place right now.
++++++
Sunday, September 18, 2011
After a cursory stringing I found the soundboard deflecting slightly convex above the rosette. Guitar building is always about pushing the limits of structure for the sake of tone and you never know whether you've corssed the line until that first stringing at tension. Fortunatly this design with a face-mounted rosette alows me to insert reinforcing splines at and above the soundhole. Also slightly visible in this shot is a scribe line around the soundhole in preperation for recessing the rosette into the top; a need also discovered after stringing! There is a reason that the vast majority of historic examples had rosettes mounted to the underside of the table. This will absolutly be the last time I use these resin rosettes. Even as a budget option they are more trouble than they are worth. My CNC rosette carving experiments are ongoing. . .
A simple plywood case. I have found it's easier to make it complete then saw it open.
The implements of fretting. Using gut frets this time. My secret to well sealed pegs? Bag Balm. Moo.
.jpg)
++++++
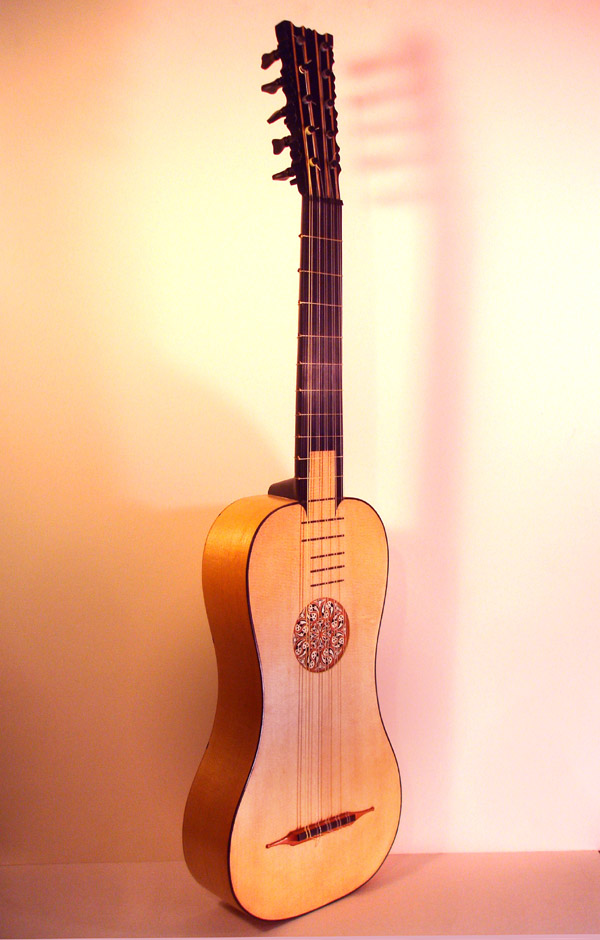
The finished instrument


++++++
Replacing the bridge of a Mexican-made baroque with a new pearwood bridge to reset the string height.
.jpg)
A bridge replacement of an instrument made in Mexico to plans drawn up in Japan. This bridge had slots rather than holes tapped for the strings.
.jpg)
Using a template to transfer the hole spacing.
.jpg)
The new bridge in place.
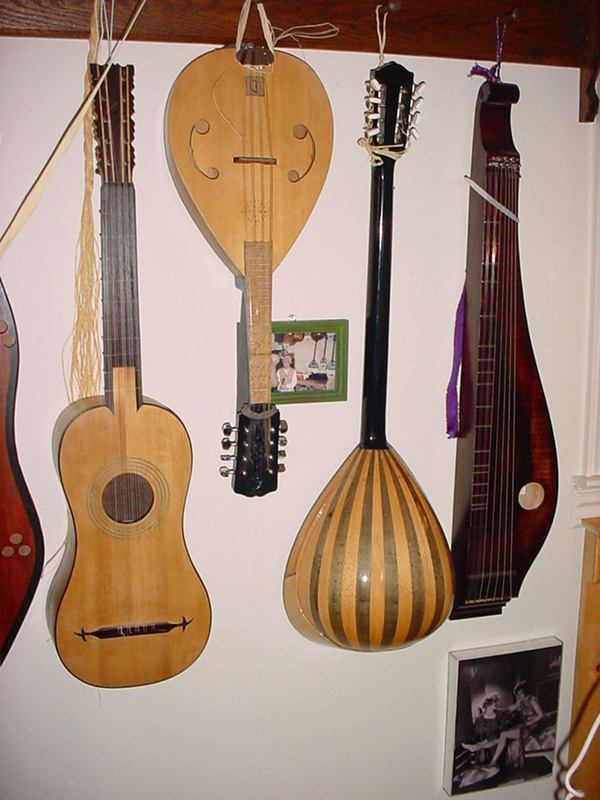
My very first baroque without a rosette. . .hanging next to my long-lost 'Irish' mandolin with medieval c-holes.
- Kevin Coates on the Choc guitar, Conservatoire de Musique, Paris