![]()
![]()
![]()
![]()
 .
. . . .
.
. . . .
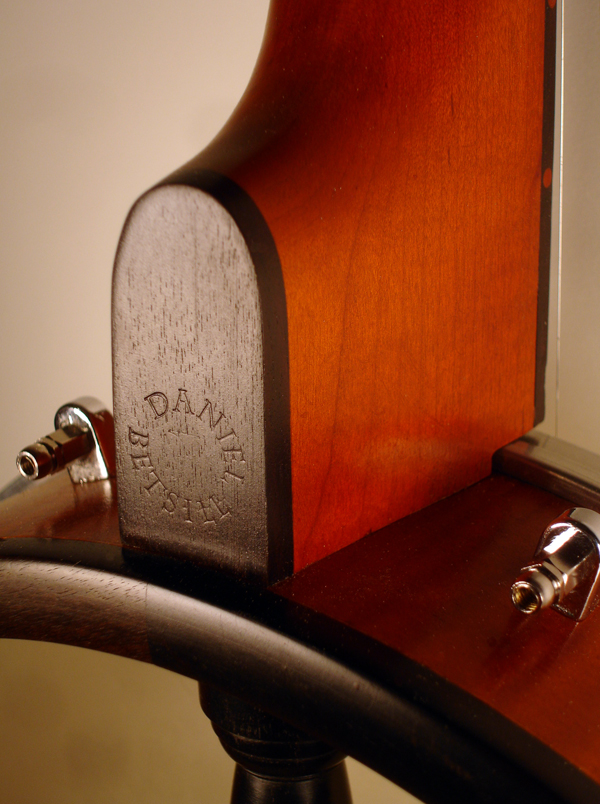
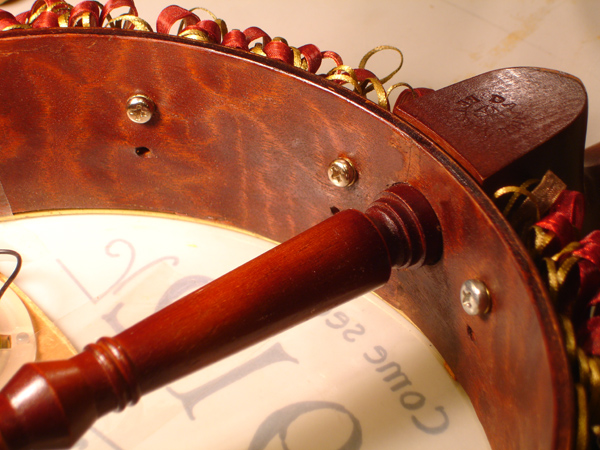
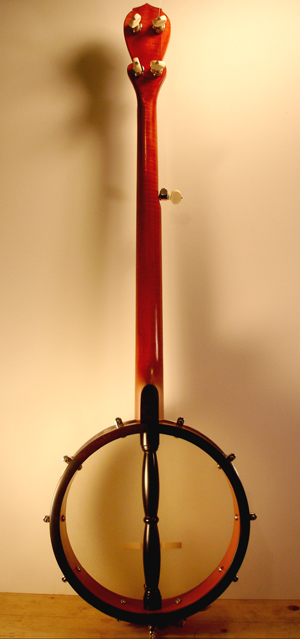
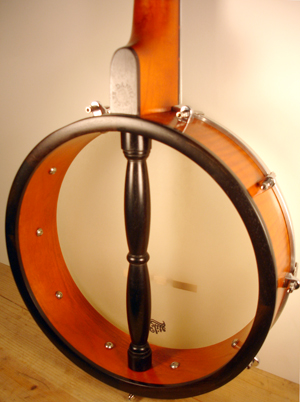
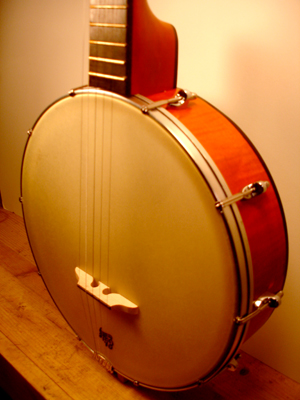
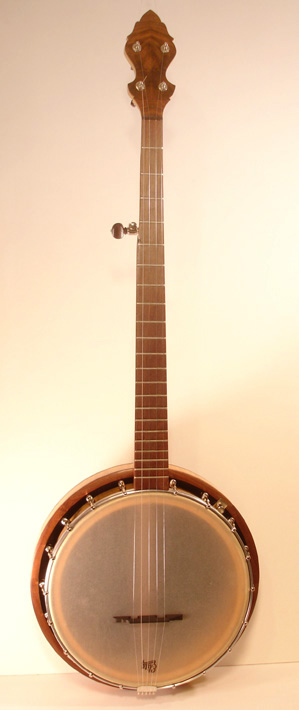
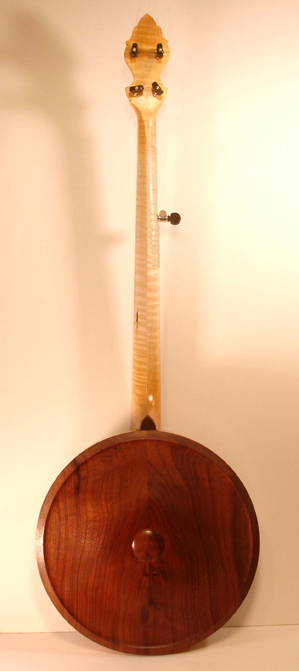
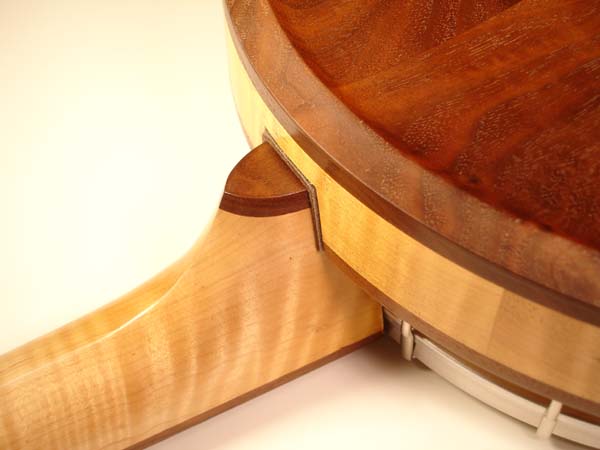
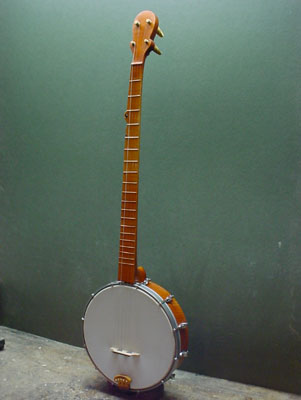
My focus with banjos is the late 19th c. open-back 5-string instrument. (left) The heel of my standard model showing ebony fittings and my signiture feature which is a fully turned through-rim dowel-stick. (right) a 4-string tenor banjo with a themed head and vaudeville fringe.
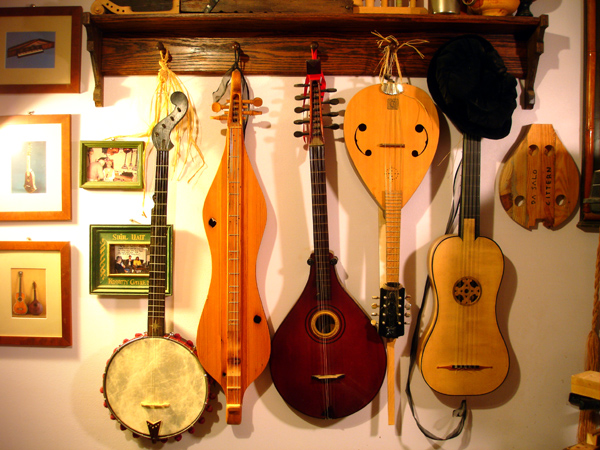
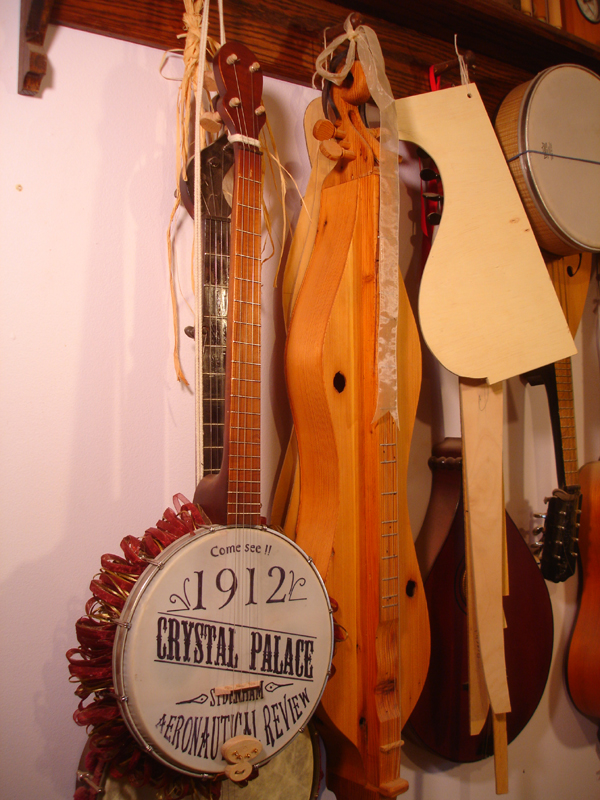
My version of the Esperance Boucher instrument (left) hanging around with some friends.
 ..
..
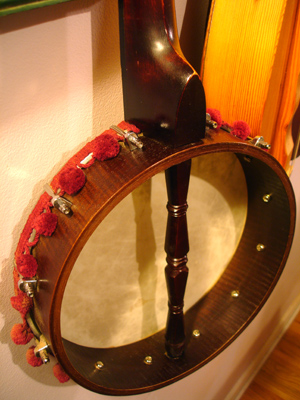
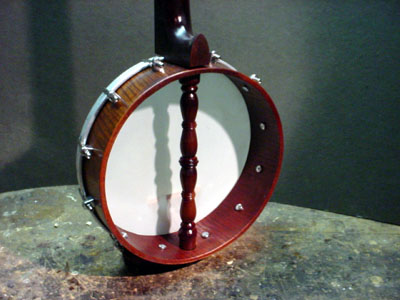
The head and rim of the Boucher model . The rim is stained, figured sapele and the v-profile neck and dowel are maple. The ball fringe gives it that Victorian vaudeville touch.
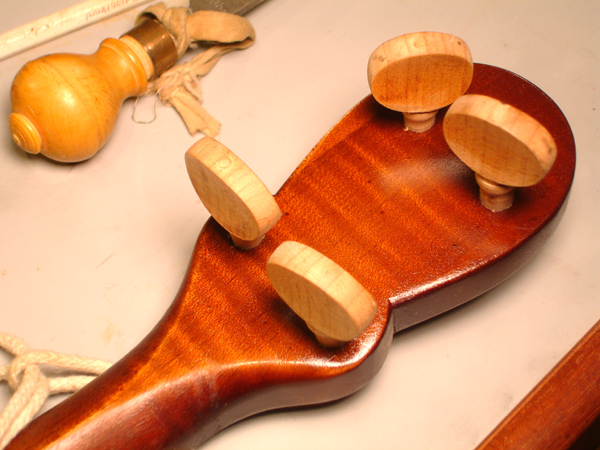
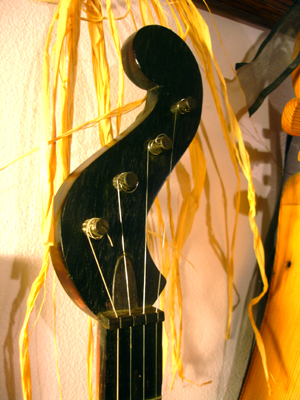
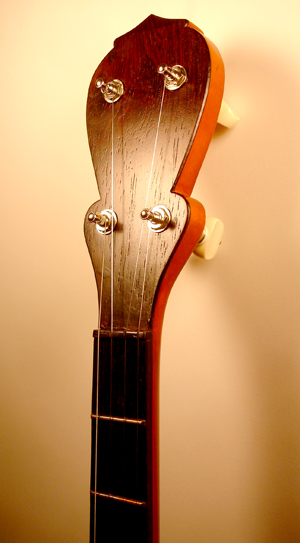
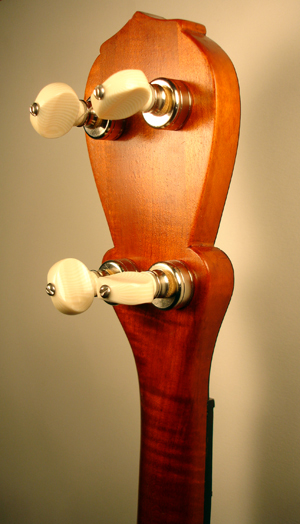
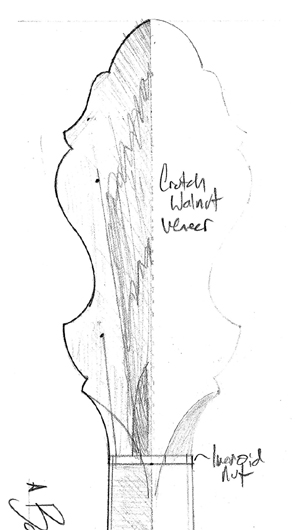
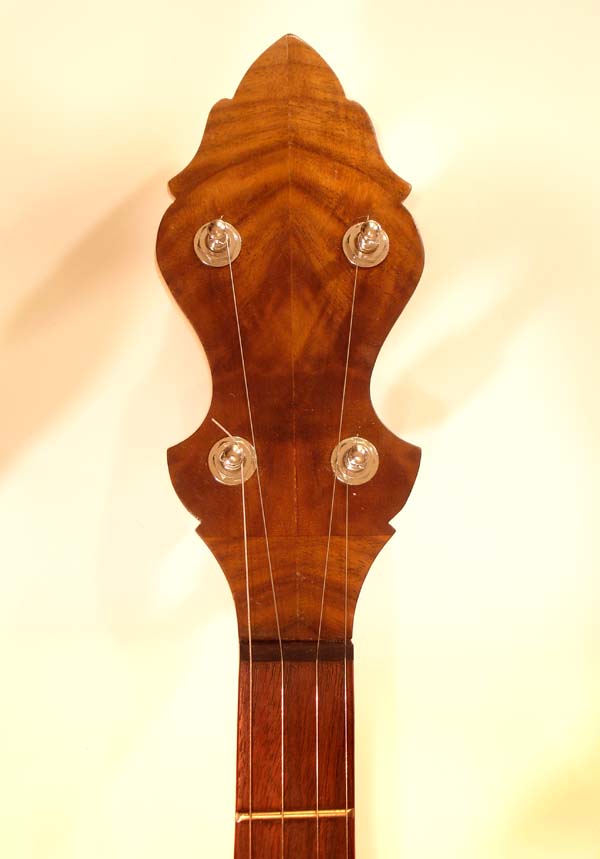
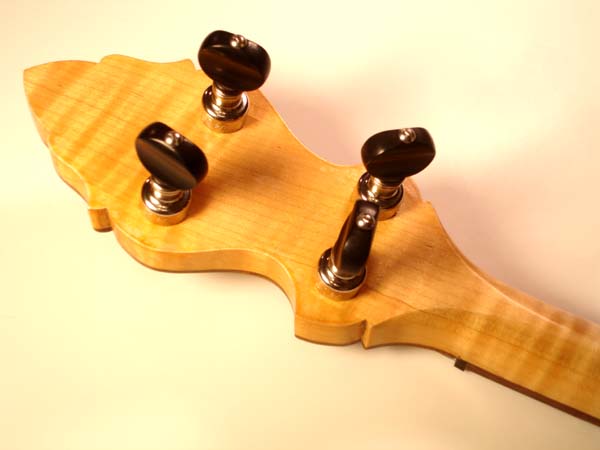
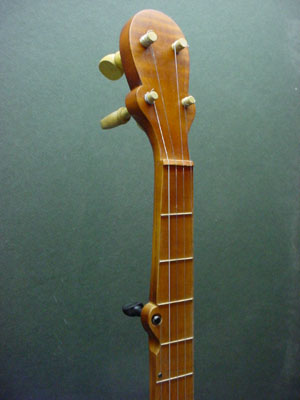
My typical peghead shape is a simple clover, sometimes with a pointed crown, which tapers into a v-shaped neck profile. This instrument features oversize maple pegs.
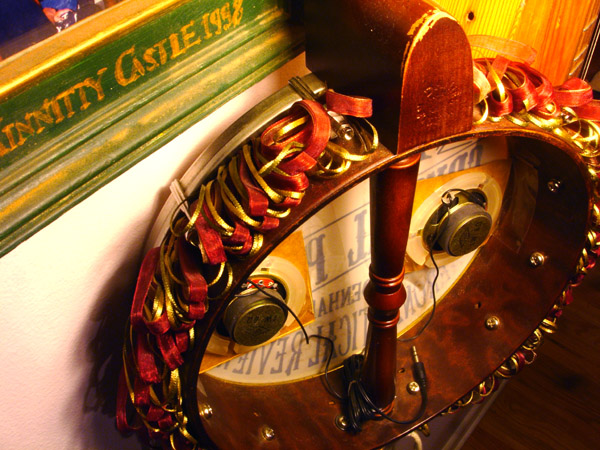
Wired for sound! ! !
This instrument has a dowel-stick shape inspired by an Edwardian stair picket design and has a block-modeled makore rim.
++++++
 . .
. .
 .
. 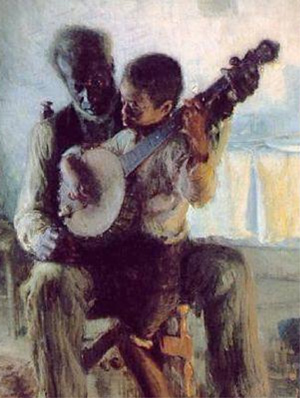
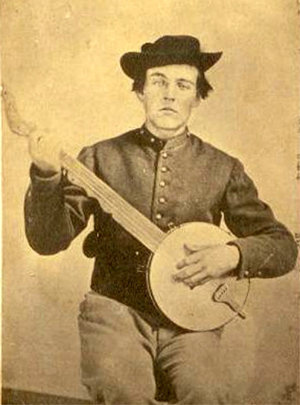
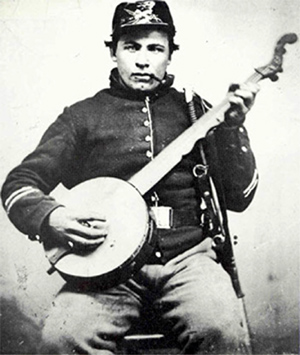
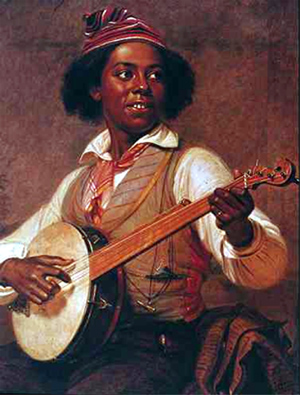
Some of the early banjo iconography: Two Civil War-era daguerreotypes depicting Boucher-type instruments, William Sidney Mount's 'Banjo Player' from 1856, Henry Ossawa Tanner's 1893 'The Banjo Lesson'
++++++
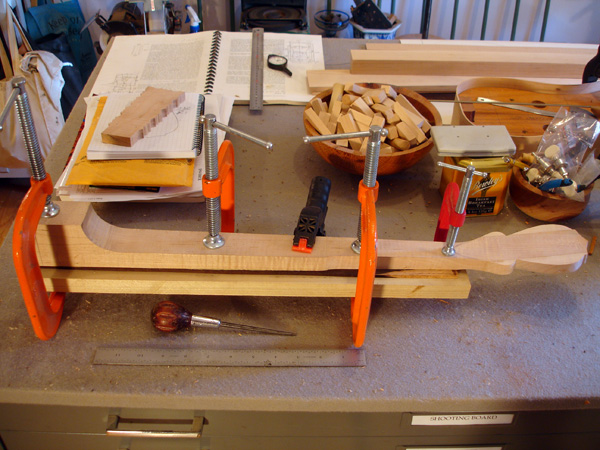
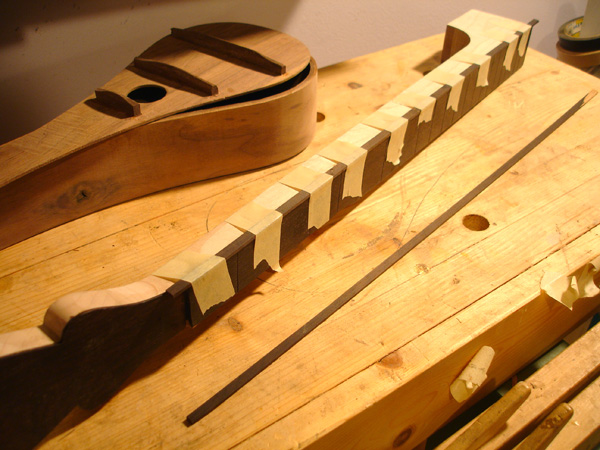
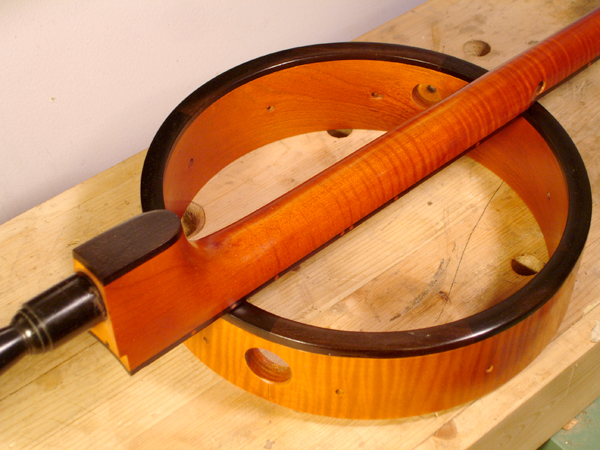
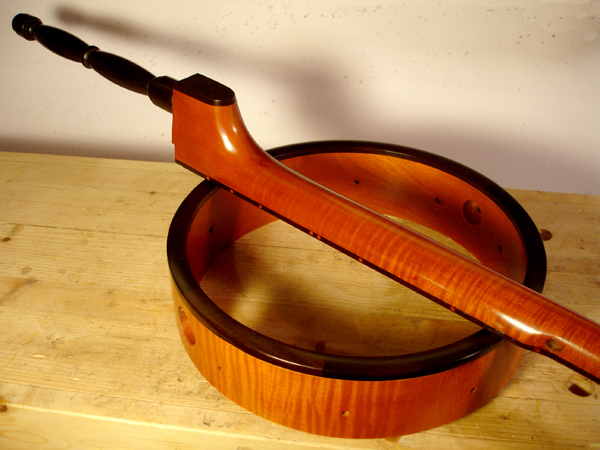
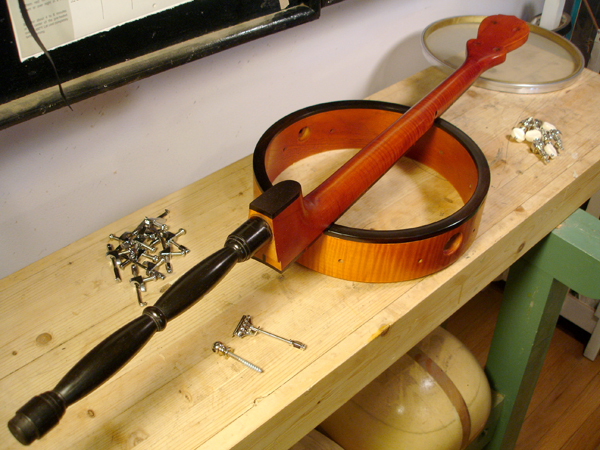
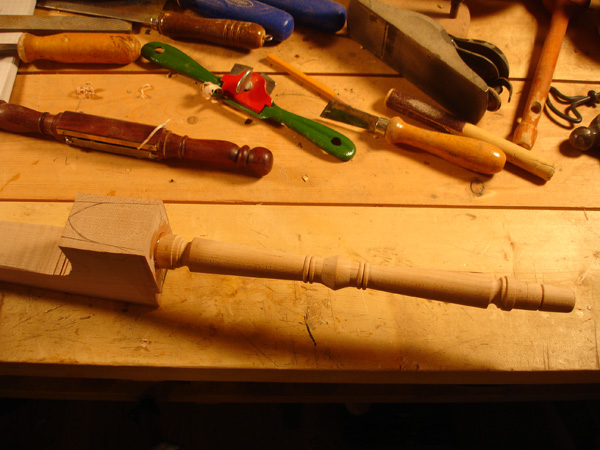
Following are some process shots of making my open back banjos. Some are faithful reproductions of late 19th c. instruments. But most have modern fretwire, hold-downs and heads but historic details including friction pegs. All have what I've adopted as my one consistent signature feature which is a highly-turned dowelstick.
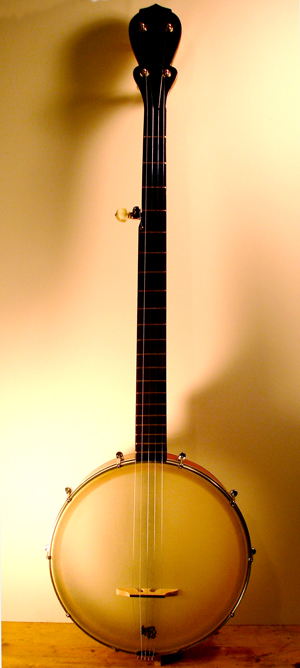
The first banjo I made. . .a Boucher-style instrument with frets.
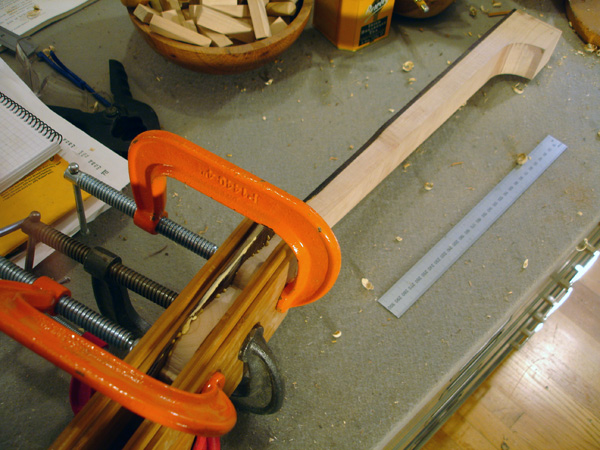
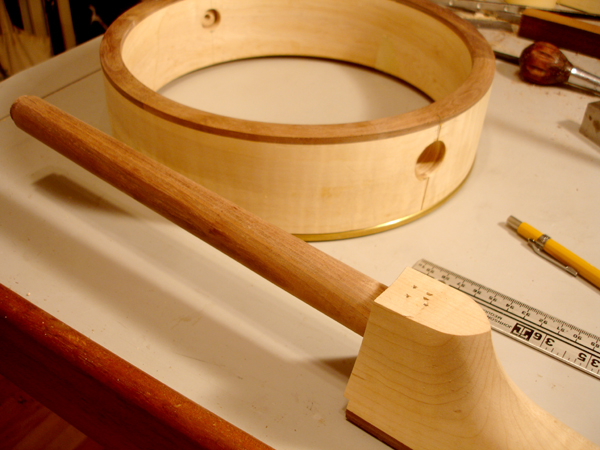
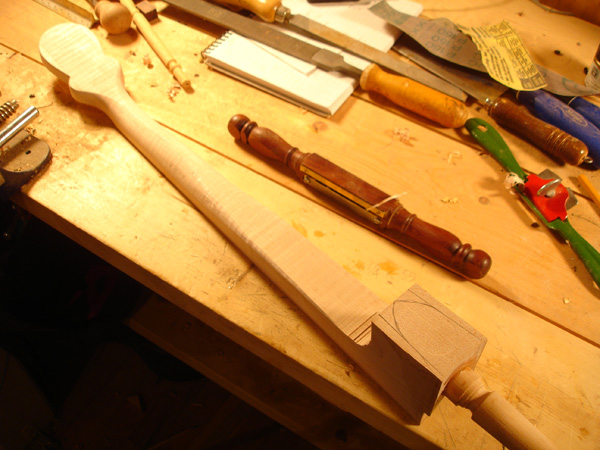
This is my favorite part of making a banjo: shaping the top of the neck. It needs to be shaped just so, because this is where you hand spends the most time on a necked instrument: the first position
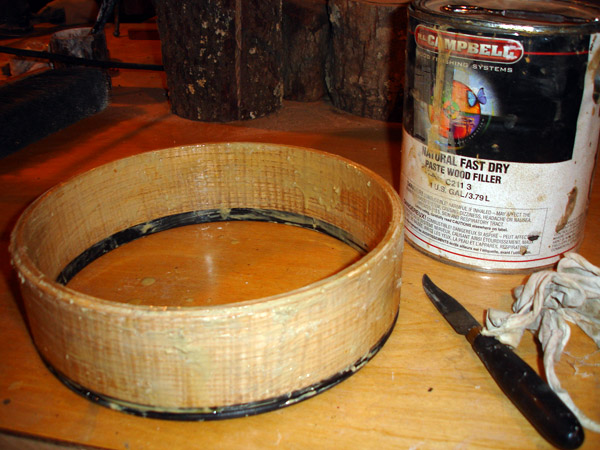
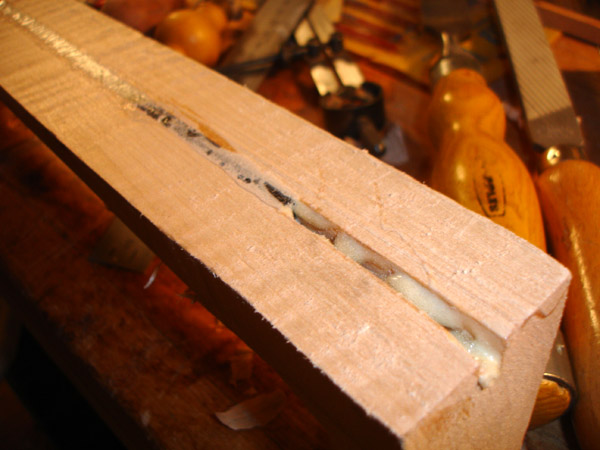
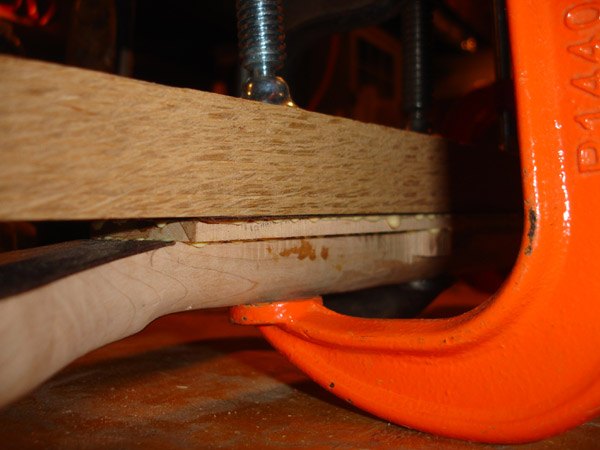
This instrument has a figured ash rim and is getting an ebony edge band (left) After the Heaven's Door project I swore I would never use this stuff again. . . but here we are! I'm filling the open grain of the ash with goop.
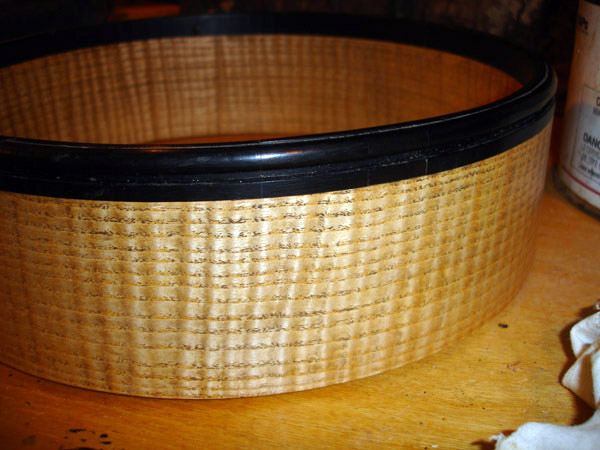
It does make a nice finish though.
Gluing up the peghead veneer. Here, two layers of rosewood are being pressed. Besides giving the desired visual thickness, laminating two pieces in opposite grain directions gives the added benefit of deterring peghead splitting.
![]()
The dowel stick blank barely fits on a 14" lathe.
The peghead veneer is being trimmed
Peghead veneer trimming complete
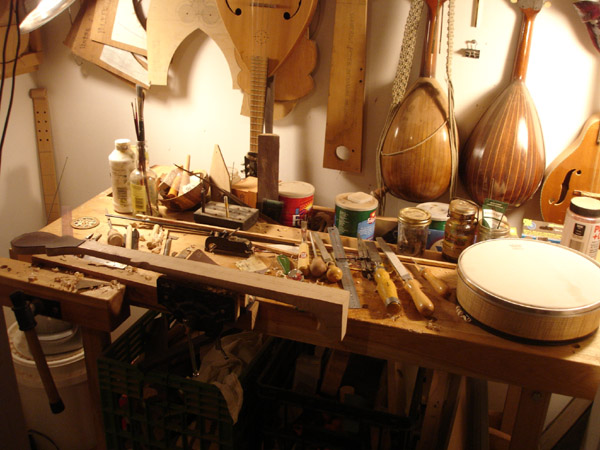
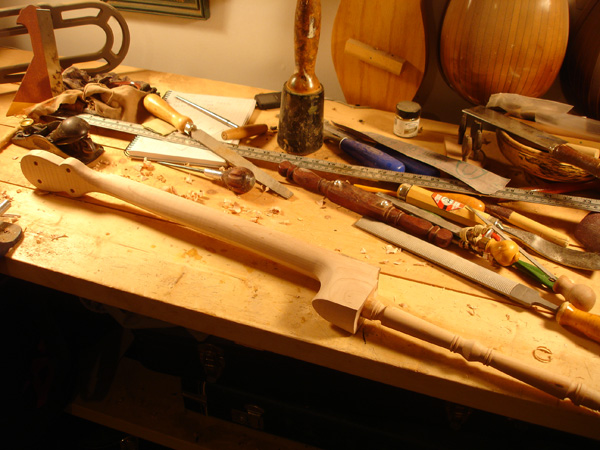
General view of the work
The carbon fiber reinforcement stick is set into the neck. I have used truss rods in the past, but for these historical banjos I find that to be not only anachronistic but overkill. When these carbon fiber rods came out I was an instant convert. For a low-tension instrument like a banjo it's a great feather-weight alternative.
close-up of carbon fiber insert. I use my table saw to make the channel, and because the blade is slightly wider than the insert, I use gorilla glue to set in place because the expanding foam will prevent the rod from ever rattling.
The stick stops about two inches short of the heel, but this is a place where deflection will not occur.
With the reinforcement rod in, the fingerboard can be glued on. Here I am killing two birds in one by gluing the rosewood veneer on as well.
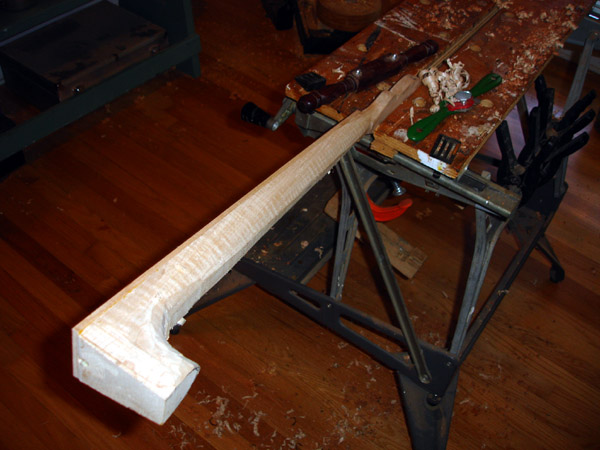
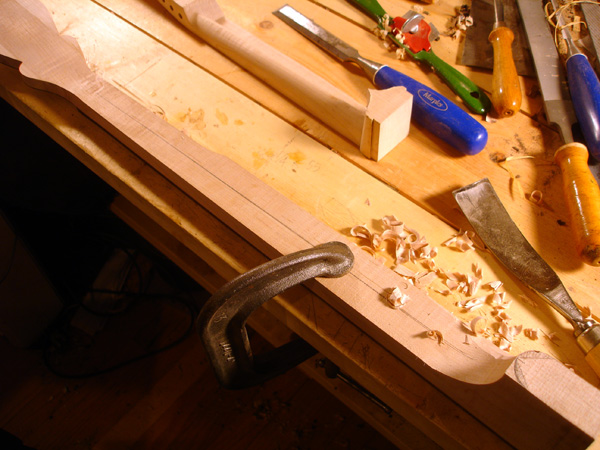
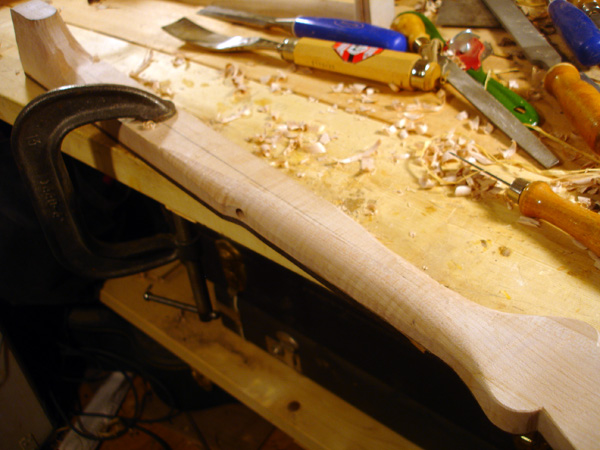
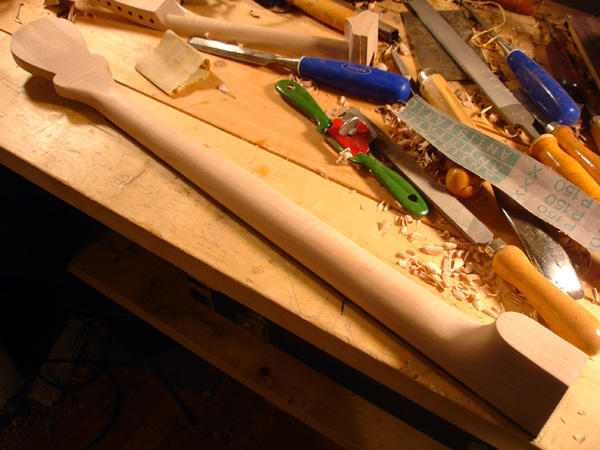
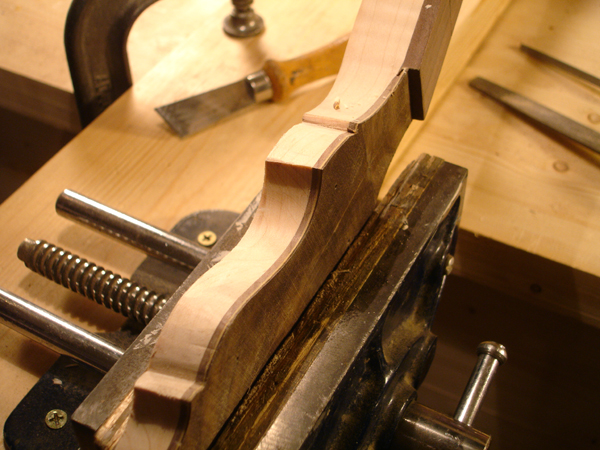
Shaping the neck: my second favorite opperation in banjo construction. Note figured maple starting to shine.
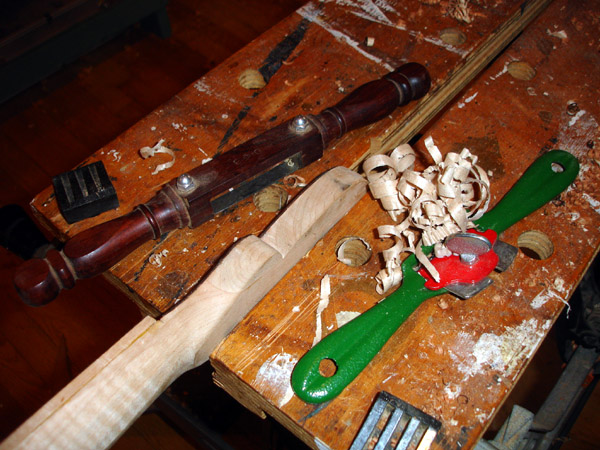
I use two different spokeshaves for this work: The cast-iron piece-o-crap for the rough work and a rosewood shave of my own design for the final shape. I will also use cabinet scrapers for the fine work. The goal is to have to do as little sanding as possible.
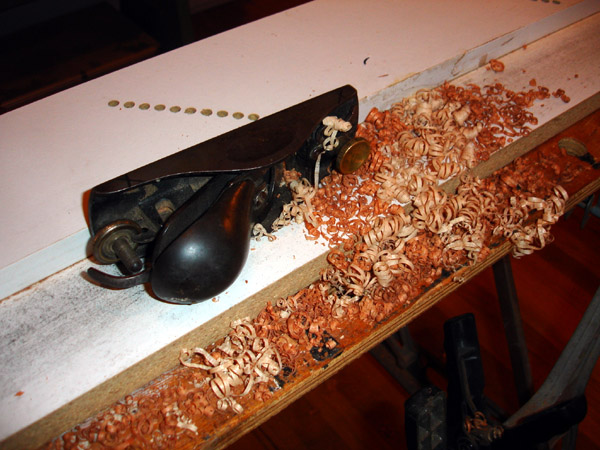
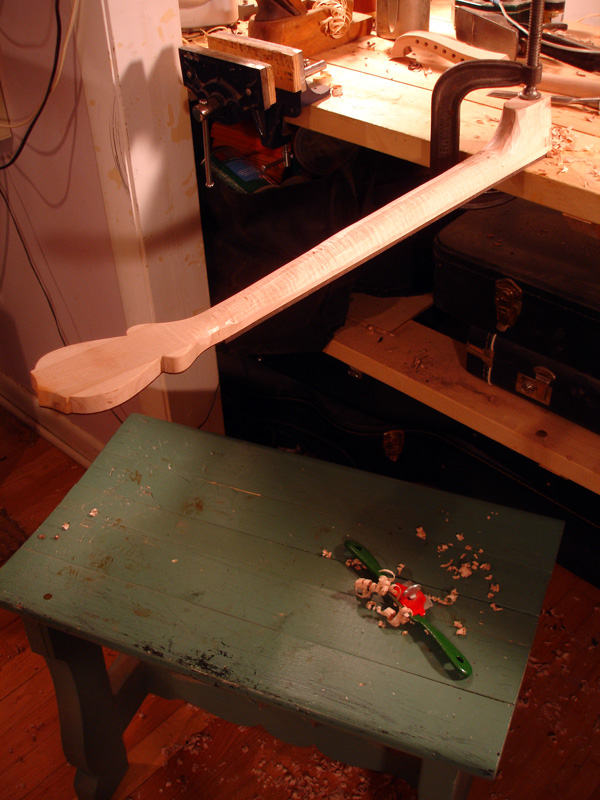
The sign of a good night's work. The pile on the floor is about 6" high. This is actually from shooting maple and cherry staves for a cittern back that I am working on in conjunction with the banjo.
++++++
FROM START TO FINISH: AN OLD-TIME BANJO
Thursday, October 14, 2010
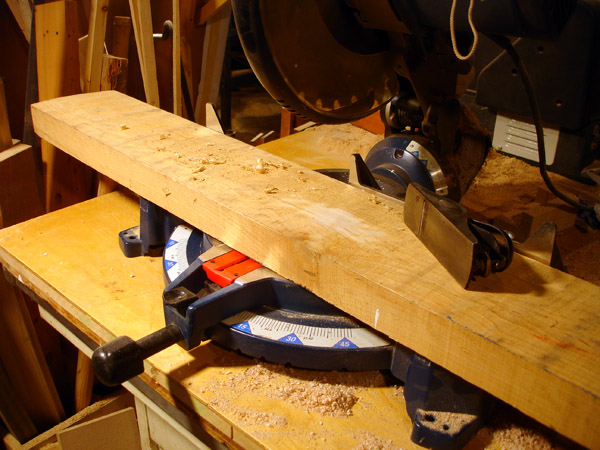
A giant slab of rock maple: where all banjos come from. I've planed an area smooth to see which part has the best figure for the neck and which part will be the rim core covered up by veneer.
Saturday, October 16, 2010
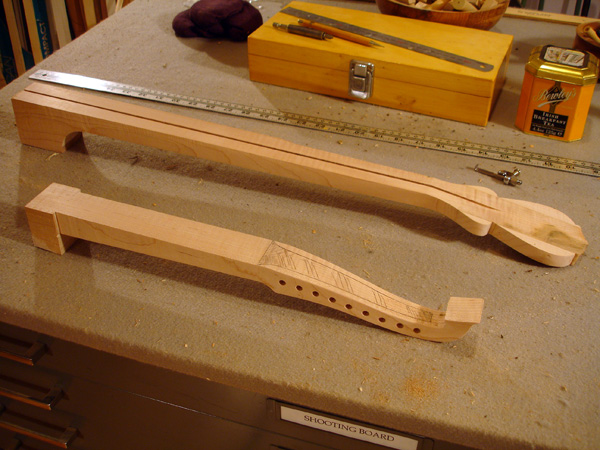
Here's the neck roughed out of figured maple. And a cittern neck to keep it company.
Tuesday, November 30, 2010
.jpg)
The carbon fiber rod is in place. Also the ebony board I will be using for the fingerboard and binding strips
.jpg)
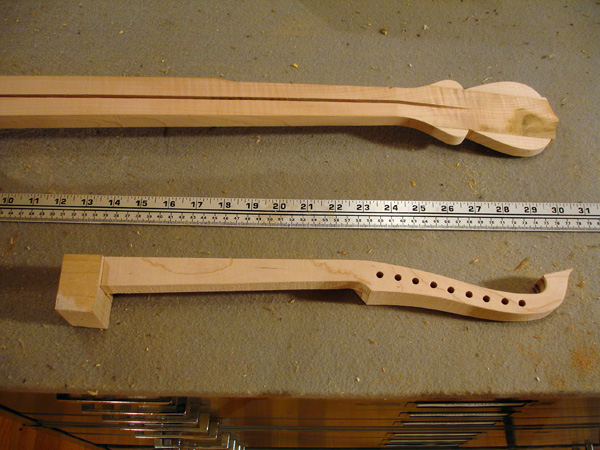
The finished fingerboard. The taper of the neck will just miss the sap wood on this piece

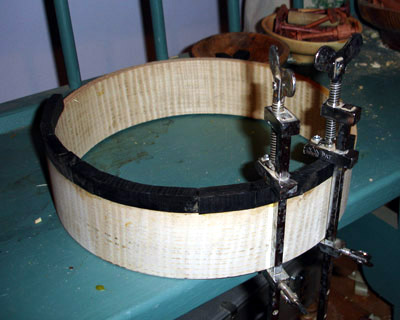
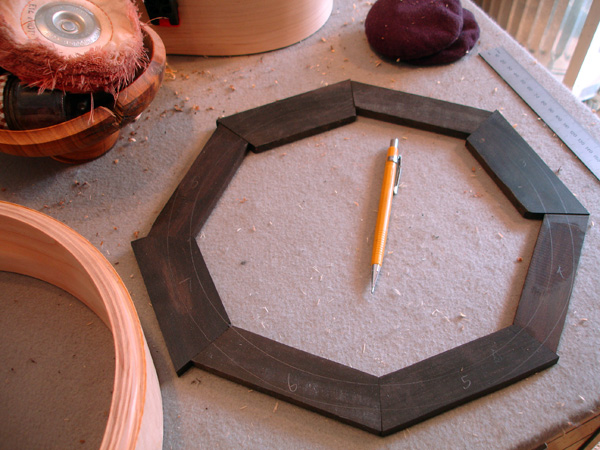
The form for my 11" banjos. I will be bending the 3-ply maple laminations around this after they are steamed. My previous banjos up to this point have been made with many (12 or more) laminations of veneer, and making a rim not as thick as is wanted for this instrumnet, so I have re-tooled the form to accept a thicker finished rim.
Gluing up the fingerboard and peghead veneer before the shaping of the neck.
Gluing on the peghead veneer. I'll put pieces on the back as well to cover up the contrasting grain of the three pieces that make up the peghead. I'll wind up cutting the fret slots and routing and applying the ebony binding strips before shaping the neck. Live and learn! It's easier to hold a piece of wood in a vise if it is rectangular. And it took many instruments for me to figure out that binding a fretboard is easier before the frets are hammered in place.
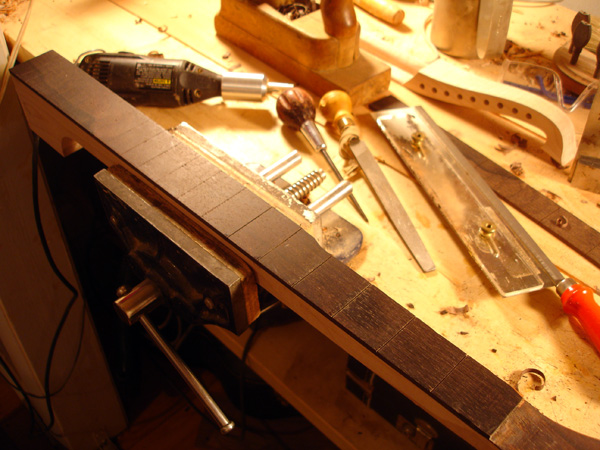
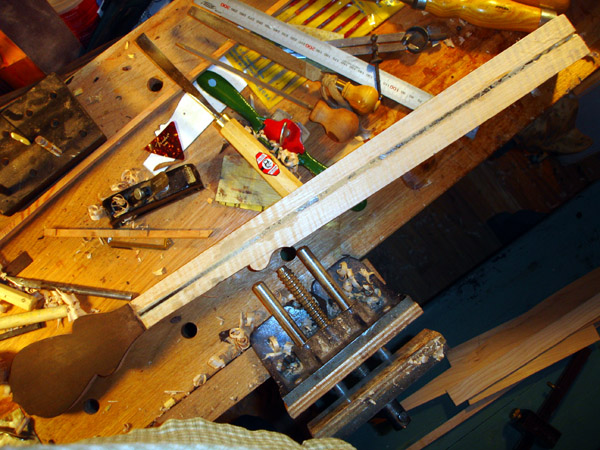
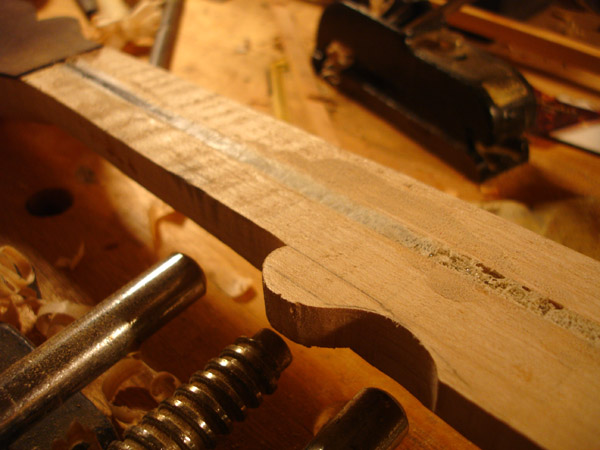
The fingerboard is trimmed flush to the neck and fret slot cutting is underway. After marking off the fret locations from a chart I use a scratch awl dragged along an adjustable angle gauge to create a groove for the saw to find. Visible is the dremel attachment for cutting the binding channel.
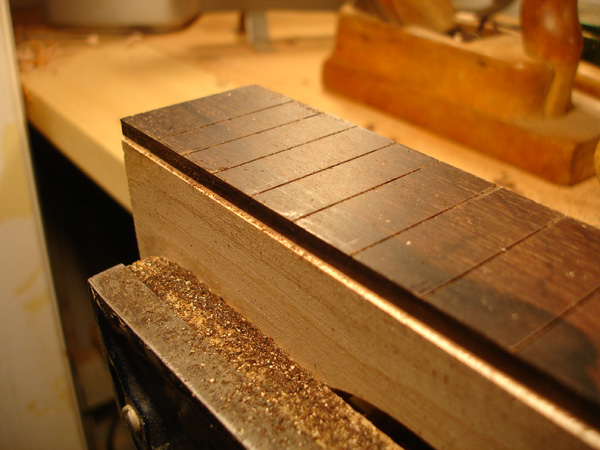
Binding channel cut
Gluing on the first ebony binding strip. Strumstick in progress.
Tuesday, January 4, 2011
The bindings are on and the shaping of the neck begins at the heel

Detail of the heel carving
General shaping of the neck. Note 5th string hole is already tapped
General shot of neck shaping with the drawknife
The neck is shaped and sanded. Time to get started on the rim.
Tuesday, January 11, 2011
My steam "box". In the background is my form with the compression clamp around it
Attaching the outer layer of veneer the old fashiond way
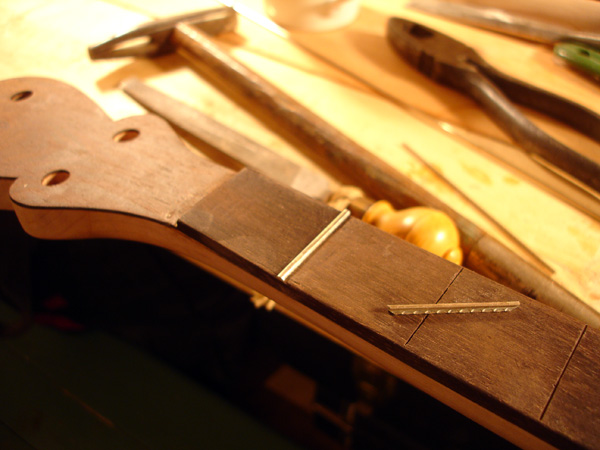
Meanwhile the fretting activity begins. Here showing the backcut to the fret tang to avoid the binding
Thursday, January 13, 2011
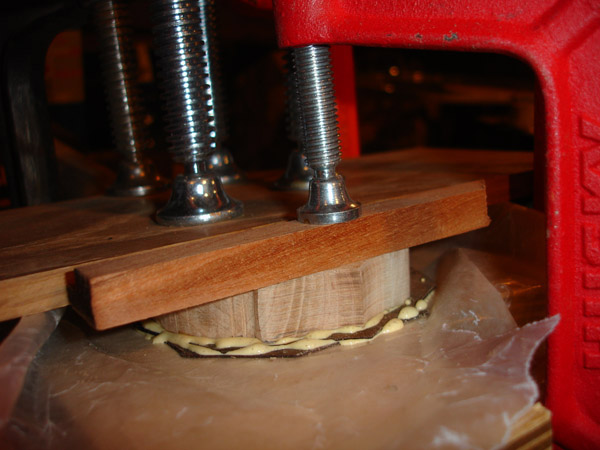
The ebony pieces for the rim edgeband are layed up
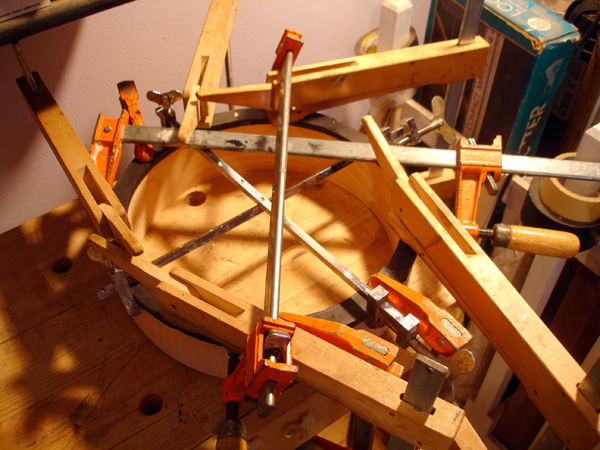
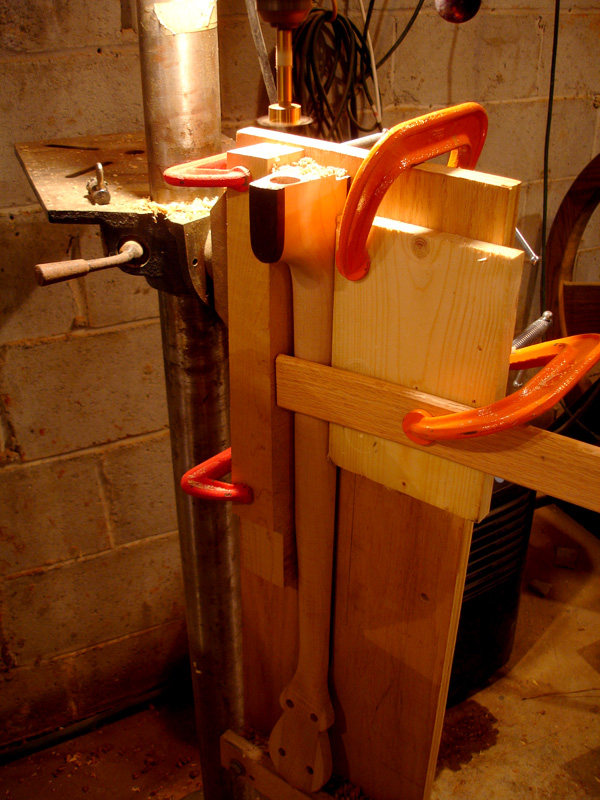
Clamping pressure in two directions on a round frame. There's really no easier way to do this.

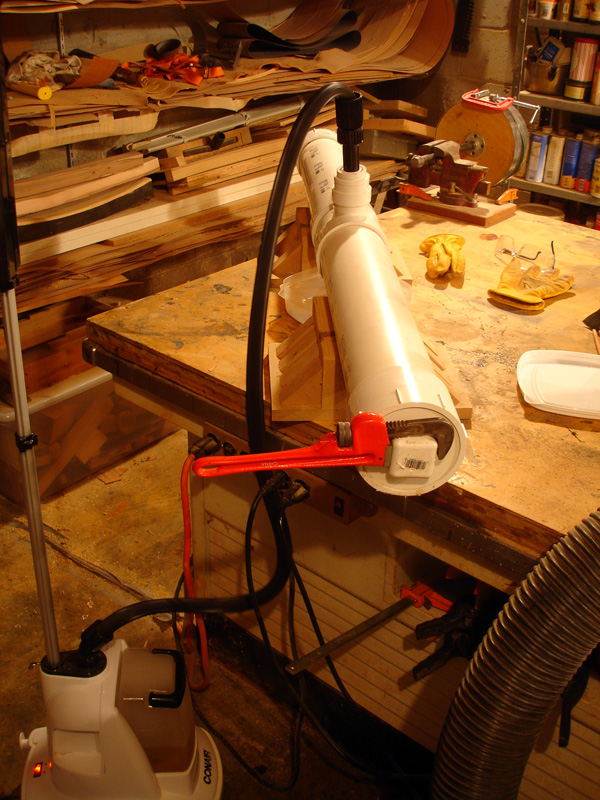
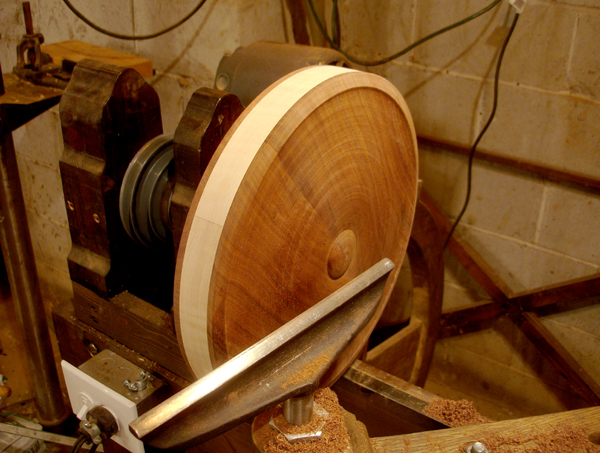
Doing the final turning of the rim. My inside lathe doesn't have the clearance, so I have to take it outside. Full contact snow turning.
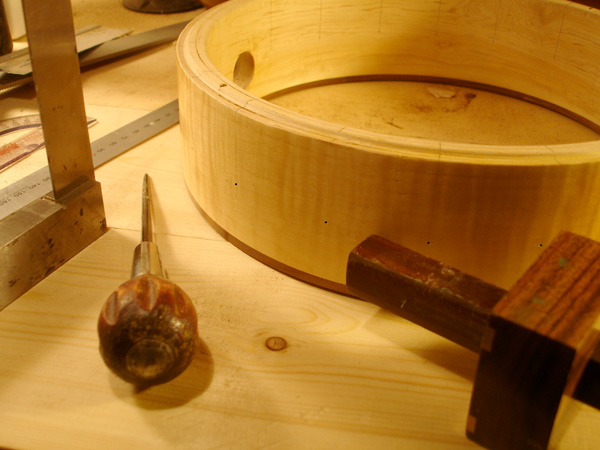
It's starting to look like a banjo. Time to start examining the hardware. The final piece to be made is the dowelstick
![]()
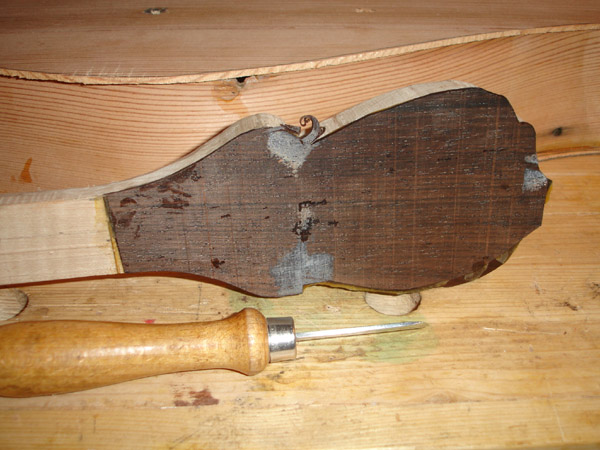
Roughing out the dowelstick from a 1 1/4" billet of ebony
Monday, January 17, 2011
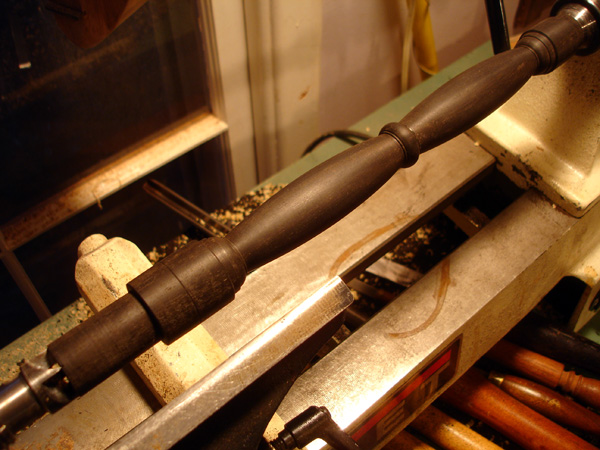
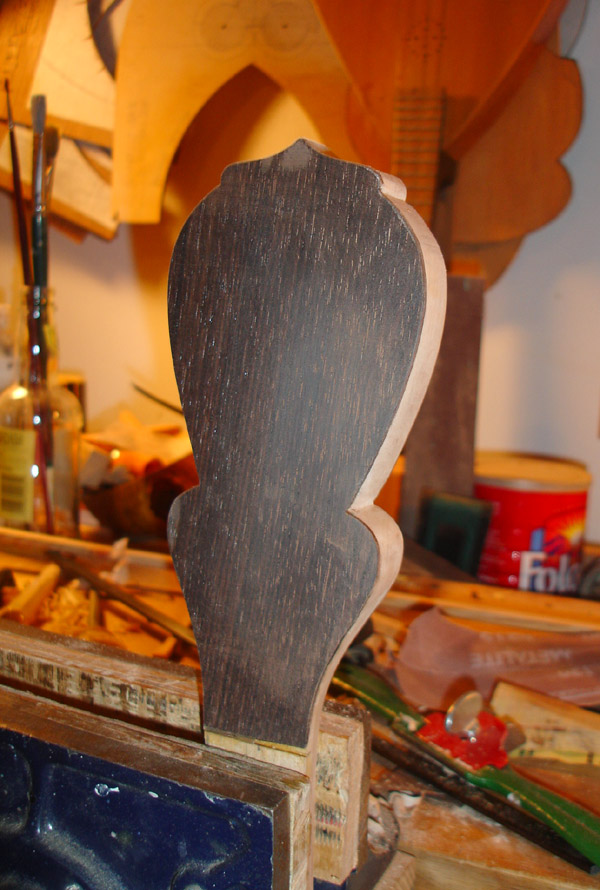
The dowel rod completed. The shape is inspired by a Victorian stair spindle design.
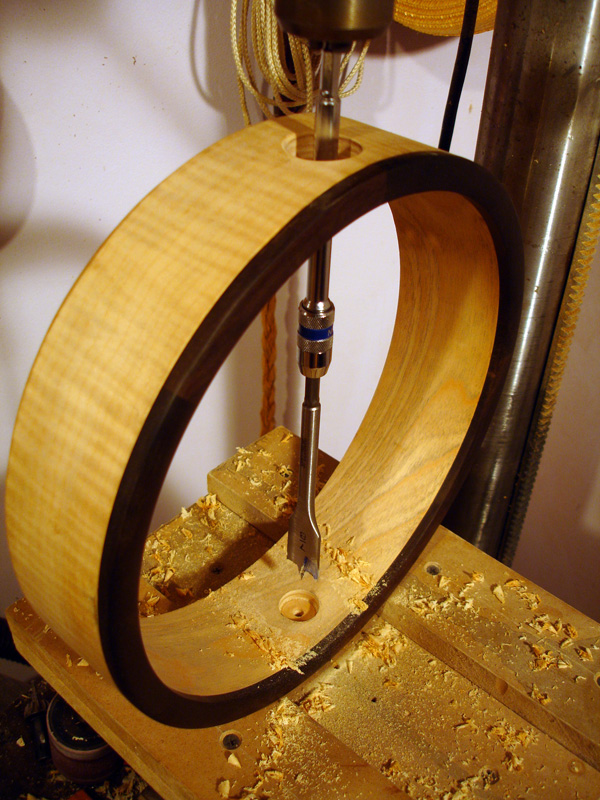
Drilling the holes for the rod. The tail end hole is a blind hole on this model. Usually my dowel rods extend through the rim for the attachment of a floating tailpiece tied on with gut, in the earliest manner. But this instrument will have a "No Knot" tailpiece for ease of maintenance
Tapping the hole for the dowel rod
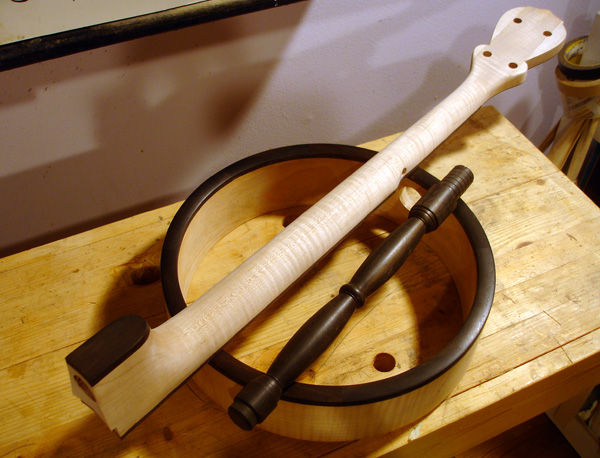
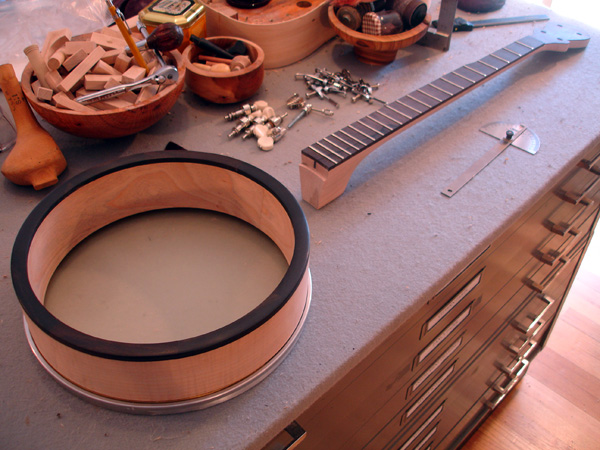
Dowel and neck are ready for assembly
Tuesday, January 25, 2011
The finish is applied. This is three coats of aniline dye suspended in acrylic: an 80/20 scratch coat with more dye in the mix, a 40/60 bodying coat, and a 10/90 top coat which allows for some final shading. It will get buffed and have a thin wax top coat. The color is a nod to the early instruments I have seen that were finished with orange shellac.
Monday, January 31, 2011
A couple of shots showing the finish before assembly
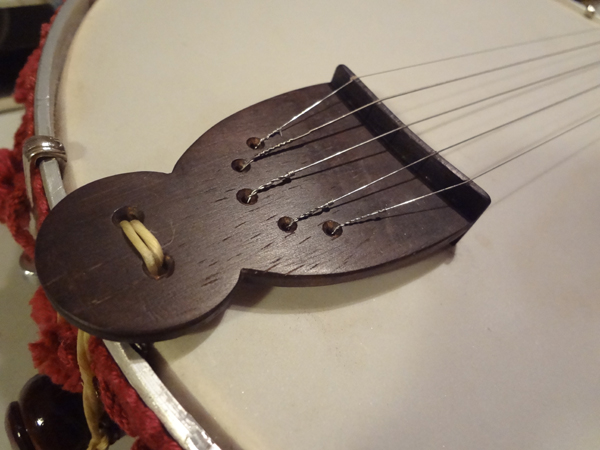
The hardware: a No Knot tailpiece with woodscrew anchor which will hold the dowel tight to the rim, 10 brackets for that slacktop oldtime sound, and Stewart MacDonald's 5-Star planetary tuners with ivoroid heads, and in the distance the Elite Amber head, solid brass tone ring and aluminum counterhoop
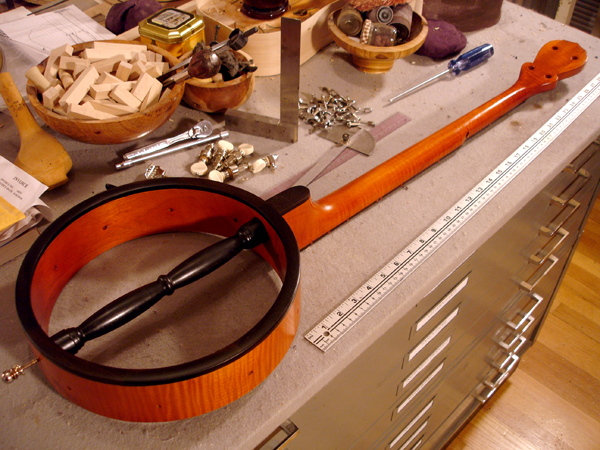
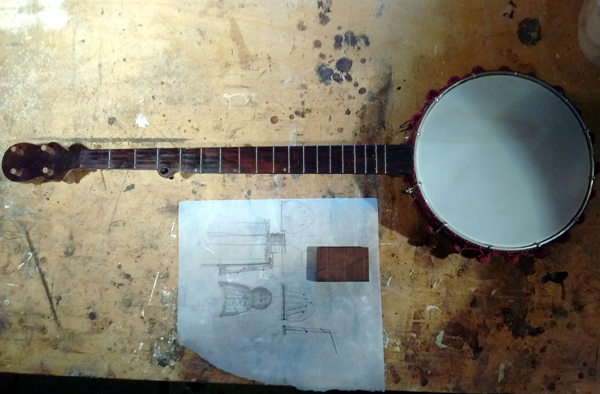
The finished instrument

++++++
FROM START TO FINISH: A BLUEGRASS BANJO
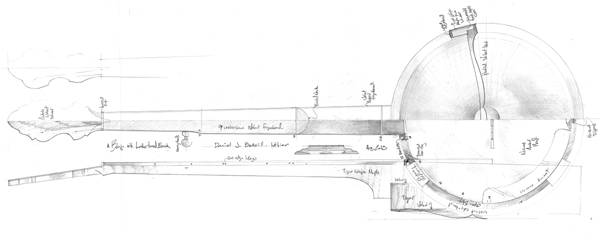
This is my build log for a closed-back instrument for a bluegrass player. With my many old-time instruments I have a feature that is unique among banjo designs and satisfies my love of woodturning: the turned, profiled dowelstick. Wanting to bring that same twist to a closed-back instrument, I've taken the typically plain (save perhaps for inlay) veneered backplate and made it a profiled, solid wood piece. And the profile I have chosen is a nod to my day-job in architecture: the shape is an elongated cyma recta. The following is my drawing with details of the backplate and the headstock design which was inspired by the Bacon & Day Montana Silver Bell from 1927.

.jpg)
The neck blank is cut form figured Southern Maple. Here I'm using two carbon fiber rods instead of a truss rod. Although, unlike my 19th c. open-back instruments, a threaded truss rod would be appropriate for this instrument, I'm choosing to keep my old-time construction in a few areas with the idea of retaining a woodier, old-timey sound.
.jpg)
The rods sanded flush, showing the extension into the peghead to reinforce the neck transition. Also visible, the rim in its ugly, post-steam bending state.
.jpg)
Live and learn. . .keep the neck square for as long as possible in the process. I will attach the fingerboard, cut the fret slots, cut the neck angle at the heel, and attach the peghead pieces and veneer all before any shaping of the neck.
.jpg)
The un-treadle lathe has had its rails lowered to accommodate the 13" diameter of the banjo back. I have a cleat temporarily glued to what will be the outside as I first turn the inside.
.jpg)
The inside of the back finished with some reference grooves for relocating the cleat as I flip it around to turn the face.
Trimming the peghead
.jpg)
The fret slots are cut and the walnut binding strips are on
.jpg)
A fret with endges rebated to clear teh edge binding
.jpg)
The frets are on. Only now will I begin to profile the neck
The neck is profiled and the dowlstick turned and in place. It is epoxied in place and set with brad nails which will be covered by a walnut heel cap. The rim has been veneered with flamed maple and the walnut edgeband is on.
The back plate shape is turned. Improved tool rest from previous shot.

A test fit of the neck and starting to lay out the hardware
.jpg)
The cleat is removed from the inside of the back plate with much difficulty and the surface is sanded. There are a couple of burn marks from the hot pallet knife I used to break the hide glue. But the inside will be painted black anyways to give a dark interior to the sound slot.
.jpg)
Putting the fret position dots in the edgebanding.
.jpg)
The parts are sprayed with tinted shellac. Everything will get a top coat of wax for protection.
Marking the bracket positions.
The 5th string tuner getting epoxied in place. And thinking about how that resonator is going to get attached. If this were an open back banjo I'd be done now. But for the first time I have to think about a resonator. To the right of the neck is the original bracket that came with the kit, which is too long. And to the right of it is the one I sawed down and re-bent. Three more to go! I guess I've got 24 hours to think about it as that epoxy sets up.
The finished instrument
.

And now. . .
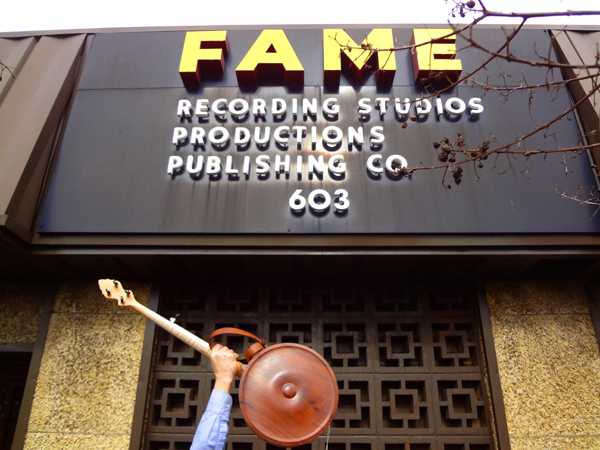
. . .taking it on the road to Fame studios in Muscle Shoals. . .
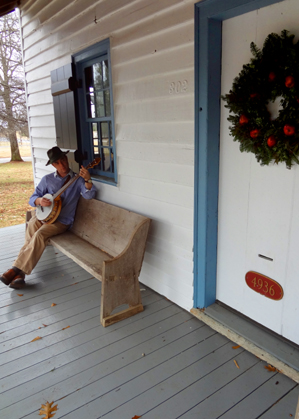
. . .and playing outside the old post office and stagecoach inn at an historic Alabama town that shall remain nameless.
++++++
DETAIL PHOTOS OF THE PARLOR BANJO
This is a more delicately-proportioned instrument with a 10" head, similar to lady's banjos of the 1890's. Most have v-shape neck profile and clover-shape peghead. It is a very light instrument with a punchy sound.
Showing occipital 5th string detailing. This model has boxwood pegs and fittings, figured maple fingerboard with figured binding, figured peghead facing. (right) Showing 10" head with 12 brackets
Showing a previous model in figured sapele in a red finish. My previous version of this instrument had a solid lathe-turned rim and a hand-streached goatskin head. Because of the thickness of the rim and the humidity-affected head, that instrument was not a success. The new version has a light but penetrating tone at the bridge and a mellow, reedy sound at the neck position. The stretcher design is my own. The clover-shaped peghead and serpentine, occipital 5th string peg detailing are accurate to many pre-civil-war period instruments. This would be an excellent reenactment instrument. 10" diameter head.
And here are some images of making a late 19th century-styled tenor banjo
![]()
The neck blank, showing a carbon fiber truss rod
Shaping the neck and heel
The dowel stick, inspired by an Edwardian stair baluster design.
The neck assembly complete.
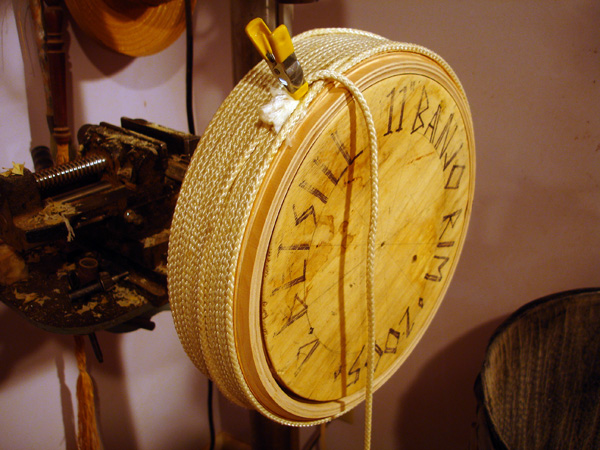
The finished instrument, with themed head design and burlesque ribbonwork around the rim. The instrument behind it, a Boucher model, has upholsterer's ball fringe around its rim.
++++++
Friday, March 18, 2015
This is one of the first banjos I made which became a wall-hanger after I made some better instruments. But it's getting a second life with a new tailpiece. Although I made it with a 10" head I naïvely copied the fret pattern of an 11" instrument. Which put the bridge really close to the bottom of the head. Besides negativly impacting the sound it just looked bad. But I had the idea to fit it with a combination bridge/tailpiece which was found on some of the earliest gourd instruments. Not a feature that persisted into the manufactured-rim instruments of the post-Civil War but it's a folky nod to something a rural craftsman might do and this instrument is certainly folky. Also in the aesthetic department I'm making it a "moon shape" to echo the curves of the headstock. If it doesn't improve the sound at least it will look better hanging on the wall.
Surprisingly it doesn't sound any worse than when the tailpiece and bridge were separated. This instrument is never going to sound great due to other reasons, but at least now it looks cool.
++++++
Saturday, July 18, 2015
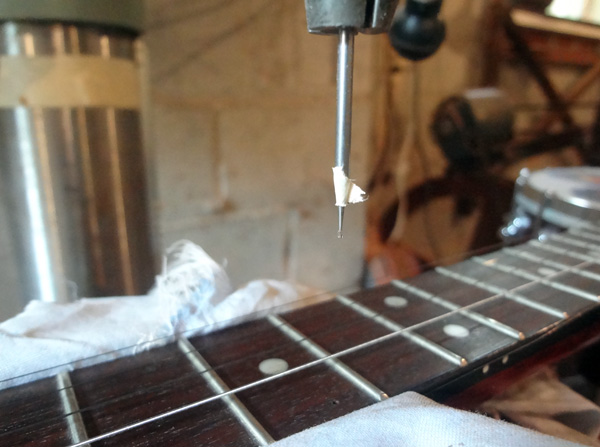
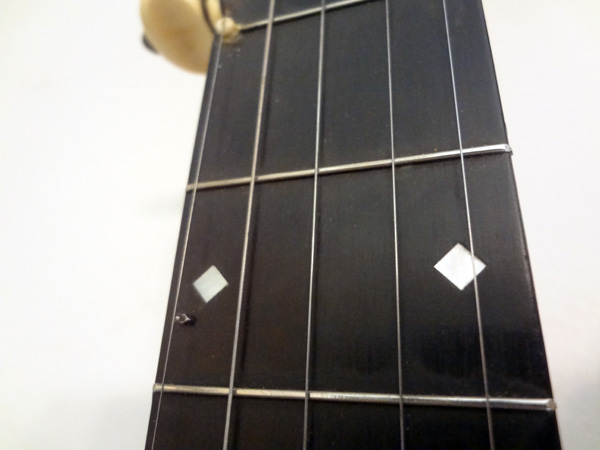
Putting railroad spike 5th string capos on a couple of banjos. I used a 1/32" Dremel engraving bit to tap the holes. Found that putting them directly under the string was the way to go for minimal deflection. Just had to file down a bit to prevent buzzing.
++++++
Banjo chap book:
The instrument proper to them is the Banjar, which they brought hither from Africa.
--Thomas Jefferson, from Notes on the State of Virginia
On the other hand, the banjo has a positive musical charm in the country. Here we can see that it fits the surroundings. Its half barbaric twang is in harmony with the unmechanical melodies of the birds.
-- Philadelphia Music and Drama, 1891
We desire to call particular attention to the new improved Monarch Stage Banjo. The success of the "Monarch" has lead to still grater improvements from the hands of a skillful Banjoist now in my employ. His thorough knowledge of the Instrument has lead to several practical improvements that will be fully appreciated by those understanding the instrument. The rim is of Ebonized Ash, encircled by a broad full nickel-plated band, to which 30 highly ornamented Brackets are attached, and are also connected with a burnished metallic hoop that secures the head in place n a most scientific manner, and prevents all danger of the head tearing, as is too often the case with low grade instruments. The Arm is of Black Walnut finely finished. The appearance of the Banjo is at once striking and novel.
-- Connelly and Co. catalog, 1891 advertising "A $12 Improved Monarch Stage Banjo for only $8.00"
You couldn't pack a Broadwood half a mile/ You mustn't leave a fiddle in the damp/ You couldn't raft an organ up the Nile./ And play it in an Equatorial swamp./ I travel with the cooking-pots and pails/ I'm sandwiched 'tween the coffee and the pork/ And when the dusty column checks and tails,/ You should hear me spur the rearguard to a walk!
--Kipling, from The Song of the Banjo
When you want real syncopated rag, well done with pleanty of gravy, have it served hot on the banjo.
--Thomas J. Armstrong
DOUBLE PAY is paid to the TANGO ORCHESTRAS using BANJO-MANDOLINS or BANJOS! All the social events of any note in New York and Boston must have the latest craze - the Tango Orchestra, to be a success. The dances crave the Banjo-mandolin for the Tango tempo. The snappy, chearful and exhilerating Banjo tone which moves your feet whether you want them to or not. . .
--from a Vega Banjo advertisement in The Crescendo, 1914